
How to Calculate LED Screen Resolution in 4 Simple Steps - Just 5 Minutes
If you’re unsure how to calculate LED screen resolution, this guide will walk you through it—step by step. No fluff, no technical overload. Just clear explanations, real examples, and practical tips that help you get it right the first time. Whether you’re setting up a small indoor screen or a full-size LED wall, knowing the resolution matters more than you think.
Table of Contents
1. What is LED Screen Resolution?
When people talk about LED screen resolution, they usually focus on image clarity—essentially, whether the display looks sharp or pixelated. However, in technical terms, the concept is much simpler: resolution is just the total count of pixels across the width and height. Nothing more, nothing less.
Unlike a laptop or television with a fixed resolution (such as 1080p or 4K), an LED screen is a modular system. Consequently, you build the display by combining smaller modules, meaning the final resolution depends on both the number of panels used and their specific pixel density.
For example, if your screen contains 640 horizontal pixels and 192 vertical pixels, your total resolution is 640×192. Whether this setup delivers a “good” image depends on your content, the viewing distance, and the physical size of the wall.
Ultimately, understanding these numbers is the first step toward ensuring your content looks professional. Without this knowledge, you might end up with blurry logos, stretched videos, or text that is difficult to read.
2. Essential Specs for Calculation
Before diving into calculations, there are a few important terms to understand. You don’t need a technical background to get this. Think of it as learning the pieces of a puzzle before putting them together.
2.1 Pixel Pitch (often written as P2.5, P3, etc.)
This is one of the most important numbers in LED screen design. Pixel pitch refers to the distance from the center of one LED to the center of the next, measured in millimeters.
A P2.5 module means each pixel is spaced 2.5 mm apart.
The smaller the pitch, the higher the resolution – and the closer people can stand to the screen without seeing individual pixels.
Larger pitch (like P5 or P10) is often used for outdoor LED screen where viewers are far away.
2.2 Module Size
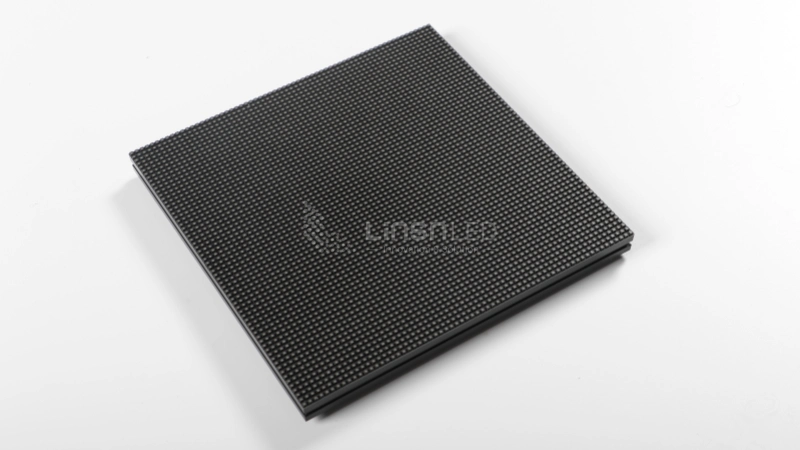
LED screens are made up of many identical rectangular units called modules. A typical indoor module might be 320mm wide and 160mm tall, though other sizes exist too.
Each module contains a grid of pixels based on its physical size and pixel pitch. This matters because you can’t cut or trim modules to make them fit – you always use whole ones.
2.3 Screen Dimensions
This refers to the total physical size of the display you’re planning to build. It’s measured in millimeters, just like module size. Knowing the full width and height will help you figure out how many modules you can install across and down.
2.4 Resolution (Final Pixel Count)
This is your end goal: the total number of pixels horizontally and vertically across the screen. It’s calculated based on how many modules you use and how many pixels are inside each one.
3. Calculate LED Display Resolution in 4 Steps
You don’t need special software or a technical background to calculate LED screen resolution. It’s basic math, and once you understand the logic, it becomes second nature. Here’s the step-by-step method professionals actually use when planning an LED wall.
Let’s break it down into four simple steps.
Step 1: Find the Pixel Pitch and Module Size
First, check the specifications of your LED module. You need two things:
- Pixel pitch (like P2.5, P3, or P4), which tells you the spacing between the pixels in millimeters.
- Module size, which is usually listed in millimeters—for example, 320mm wide × 160mm high.
If you’re not sure, ask your supplier for a datasheet or product brochure. Don’t estimate. Exact numbers matter here.
Step 2: Calculate Pixels per Module
Now divide the module’s physical dimensions by the pixel pitch. This gives you the number of pixels across the width and height of each module.
- Formula
Pixels wide = module width ÷ pixel pitch
Pixels high = module height ÷ pixel pitch
- Example with P2.5 module (320mm × 160mm)
320 ÷ 2.5 = 128 pixels wide
160 ÷ 2.5 = 64 pixels high
So each module contains a grid of 128 × 64 pixels.
This step helps you understand how much pixel “density” each module provides.
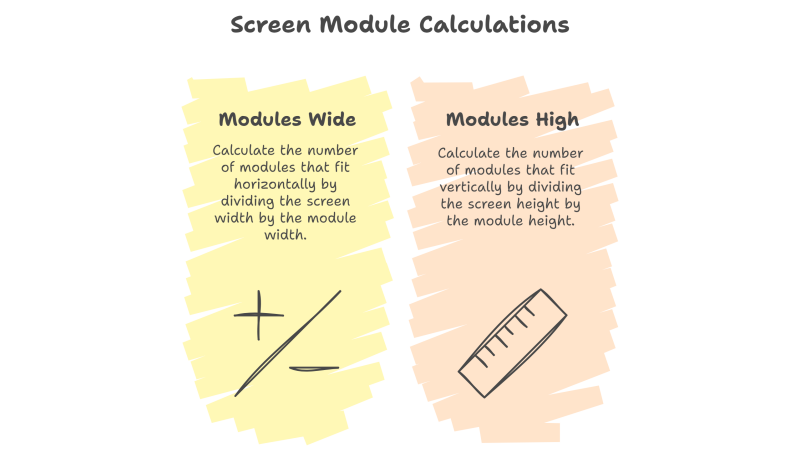
Step 3: Figure Out How Many Modules Fit in Your Screen Size
Next, take the full dimensions of your screen (in mm), and see how many modules can fit horizontally and vertically.
- Formula
Modules wide = screen width ÷ module width
Modules high = screen height ÷ module height
Important: You can only install whole modules. No cutting. Always round down to the nearest whole number.
- Example
Let’s say your desired screen is 1700mm wide and 500mm tall.
1700 ÷ 320 = 5.31 → round down to 5 modules
500 ÷ 160 = 3.12 → round down to 3 modules
So, in reality, your LED screen will be:
5 × 320 = 1600mm wide
3 × 160 = 480mm tall
That’s your actual frame size.
Step 4: Multiply to Get the Final Resolution
Now multiply the number of modules by the pixel count per module to get your total resolution.
- Formula
Horizontal pixels = modules wide × pixels per module (width)
Vertical pixels = modules high × pixels per module (height)
- Example
5 modules × 128 pixels = 640 pixels wide
3 modules × 64 pixels = 192 pixels high
Final resolution = 640 × 192
That’s your complete LED screen resolution. Every piece of content you play will be mapped to this pixel grid.
This method applies to any module size and pixel pitch. Whether you’re working with P2.5, P4, or something else, the logic stays the same. The key is getting accurate specs and using whole modules only.
4. Worked Example: Indoor P2.5 (P3/P4) Screen
Let’s walk through a real example, step by step. This will show you how the math actually works—and how different pixel pitches affect the final resolution.
We’ll use a common indoor module size: 320mm × 160mm. And we’ll try three versions of it: P2.5, P3, and P4. These are some of the most widely used specs in indoor LED screen.
Scenario Setup
Suppose a client wants to install an LED video wall that’s roughly 1700mm wide and 500mm tall. The actual size doesn’t have to be exact—it just needs to be close to the available space. Let’s go through each pitch.
① P2.5 LED Screen Resolution
Step 1: Pixels per module
320 ÷ 2.5 = 128 pixels (width)
160 ÷ 2.5 = 64 pixels (height)
Step 2: Number of modules
1700 ÷ 320 = 5.31 → round down to 5 modules
500 ÷ 160 = 3.12 → round down to 3 modules
Step 3: Total resolution
5 × 128 = 640 pixels
3 × 64 = 192 pixels
⇒ P2.5 resolution = 640 × 192
② P3 LED Wall Resolution
Step 1: Pixels per module
320 ÷ 3 = 106.6 → round down to 106 pixels
160 ÷ 3 = 53.3 → round down to 53 pixels
Step 2: Modules remain the same
5 modules across, 3 modules tall
Step 3: Total resolution
5 × 106 = 530 pixels
3 × 53 = 159 pixels
⇒ P3 resolution = 530 × 159
This is slightly lower than P2.5, as expected. But it might still be sharp enough if viewers aren’t standing too close. It also costs less.
③ P4 LED Screen Resolution
Step 1: Pixels per module
320 ÷ 4 = 80 pixels
160 ÷ 4 = 40 pixels
Step 2: Same module layout
5 wide, 3 tall
Step 3: Total resolution
5 × 80 = 400 pixels
3 × 40 = 120 pixels
⇒ P4 resolution = 400 × 120
This is a low resolution compared to the other two. You wouldn’t use this setup for close viewing, but it’s still fine for simple content or longer distances.
Summary Table
| Pixel Pitch | Pixels per Module | Modules (W×H) | Total Resolution |
| P2.5 | 128 × 64 | 5 × 3 | 640 × 192 |
| P3 | 106 × 53 | 5 × 3 | 530 × 159 |
| P4 | 80 × 40 | 5 × 3 | 400 × 120 |
This comparison makes it clear how pixel pitch affects the LED display resolution. If you want more detail and clarity, especially for small indoor screens, go with a smaller pitch like P2.5. If you’re building a bigger wall for simple video or basic text from a distance, P4 might be good enough—and more cost-effective.
5. 3 Common Mistakes When Choosing LED Resolution
Most users focus only on the budget, but ignoring these technical details can lead to blurry images or system crashes. Here are the three most frequent mistakes:
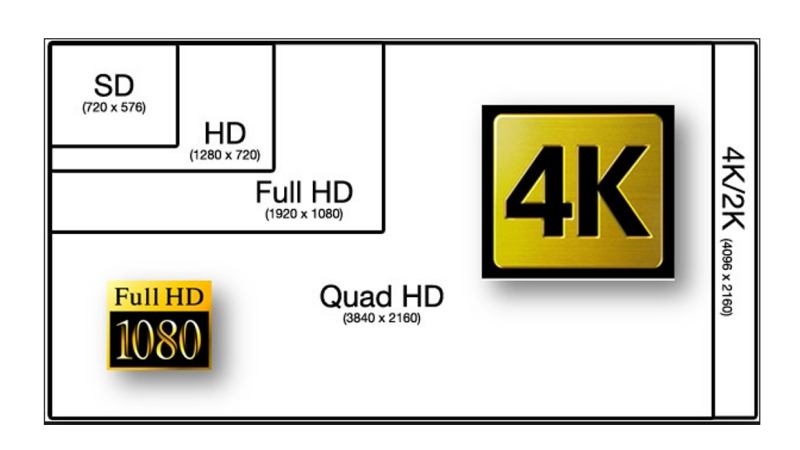
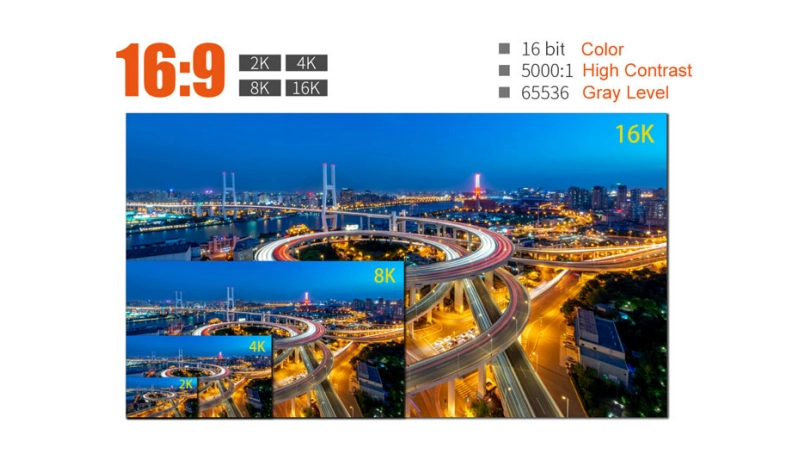
Ignoring the Standard 16:9 Aspect Ratio
Standard video content (from YouTube, laptops, or TV stations) is almost always 16:9. If your LED wall resolution is significantly different—for example, a very long or very tall screen—your images will look stretched or squashed.
Pro Tip: Always try to match your total pixel count to a standard 16:9 ratio (like 1920×1080) to avoid extra costs for custom video processors.
Exceeding the Loading Capacity of Receiving Cards
Every LED receiving card has a maximum pixel loading capacity (often 512×512 or 256×256 pixels). If you choose a high-resolution pitch like P1.53, but don’t add enough receiving cards, the screen will simply stay black.
Before you finalize your resolution, confirm with us if your control system can handle the total pixel load.
Misjudging Viewing Distance vs. Resolution
Many customers buy a P2.5 indoor LED screen when a P4 would be enough. If your audience is 10 meters away, they cannot see the difference between P2.5 and P4.
Choosing a resolution that is “too high” for your viewing distance is a waste of money. Contact LedInCloud to find the most cost-effective balance for your project.
6. LED Screen Resolution Calculator Tools and Resources
You’ve learned how to calculate LED resolution by hand—but what if you’re working with multiple screen sizes, testing different pixel pitches, or just want to double-check your math quickly?
You can calculate the LED panel resolution by some online LED resolution calculators.
And sometimes the fastest way to confirm resolution is simply to ask. Send your module type, pixel pitch, and rough screen size to your LED supplier. A good supplier – LedInCloud – LED Screen Cloud Platform can send you:
- Recommended resolution
- Number of modules
- Realistic layout suggestions
- Drawings or previews, if needed
We’ve likely done hundreds of similar projects and can spot issues you might miss.
LedInCloud High Resolution LED Display Products
7. Conclusion
Calculating LED screen resolution is a straightforward process. Once you identify the pixel pitch and module size, finding the total count only takes a few quick steps. Typically, you begin by determining how many modules fit into your designated space, then multiply those figures to get the final pixel count.
Accurately getting this number right benefits your project in several ways. Not only will your videos and text look sharp, but your content will also fit the display perfectly without distortion. Furthermore, this precision ensures your control system runs smoothly and helps you avoid costly hardware mistakes later.
Whether you are designing a high-definition P2.5 LED wall, a versatile P4 display, or aiming for a standard Full HD setup, this calculation method remains the same across all models.