
If you’re working with LED displays, chances are you’ve heard of Colorlight Cloud. They’re known for producing reliable LED control systems, and one of their most popular tools is the LEDVISION software. This program helps users manage LED screens by connecting sending cards, configuring screens, and adjusting display parameters.
Table of Contents
1. What Is Colorlight LEDVISION Software?
Colorlight LEDVISION is a control and playback software used with Colorlight LED display systems. Users can manage screen content, create playback programs, and send media files to an LED display with it.
In a LED display system, the computer runs LEDVISION and connects to a sending card or media player. The software then controls how the LED screen displays content such as videos, images, text, or other media.
This software is mainly used for several tasks:
- creating and managing display programs
- arranging screen layouts with multiple content windows
- sending media files to the LED screen
- controlling playback and screen operation
Because of these functions, Colorlight LEDVISION is commonly used in advertising displays, stage LED screens, retail signage, and other digital display projects.
2. Key Features of LEDVISION
Colorlight LEDVISION is designed for everyday LED screen operation. It focuses on program creation, content playback, and screen control. Compared with hardware configuration software, LEDVISION is used more frequently because it handles the actual display content.
Below are several core functions that define how the software works.

2.1 Program-Based Content Management
LEDVISION organizes content through a structured program system. Instead of sending single files directly to the LED screen, users create a program first and then place different types of content inside it.
The program structure usually follows this order:
Program → Page → Window → Content
A program can contain multiple pages, and each page can include several display windows. Each window then shows specific media such as video, images, or text.
This structure makes it easier to design complex screen layouts. For example, a screen can display a video in the center while showing scrolling text at the bottom and a clock in the corner.
2.2 Multi-Zone Screen Layout
LED displays often need to show different information at the same time. LEDVISION allows users to divide the screen into multiple zones and control each zone separately.
For example, a single LED screen can be arranged like this:
- a video playback area
- an image or advertisement area
- a scrolling text bar
- a real-time clock
Each zone can have its own size, position, and playback settings.
2.3 Support for Multiple Media Types
LEDVISION supports a wide range of media formats that are commonly used in LED displays. Users can insert different types of content into program windows.
Common supported content includes:
- video files
- image files
- scrolling or static text
- animated GIF content
- clock and time display
- office documents such as Word or PowerPoint
Because of this, the software can be used for many different display scenarios, from advertising to information boards.
2.4 Real-Time Screen Control
Another useful feature of LEDVISION is direct screen control. Once the LED screen is connected to the computer, the software can send programs and update the display almost immediately.
Users can:
- start or stop playback
- switch between programs
- update screen content
This makes it easy to change advertising content or display information without reconfiguring the LED system.
2.5 Scheduled Playback
LEDVISION also supports scheduled playback. This feature allows users to define when specific programs should run.
For example:
- a shop may display promotional ads during business hours
- an information screen may show different messages throughout the day
- a digital billboard may rotate several advertisements automatically
The schedule is configured directly inside the software, so the LED screen can run programs automatically without manual operation.
3. Compatible Colorlight Hardware
Colorlight LEDVISION works with several types of Colorlight control hardware.
| Hardware Type | Models | Typical Use |
| Sending Cards | S2, S4, S6, X2, X4, Z4, Z6 | Used in synchronous LED display systems connected to a computer |
| Receiving Cards | i5, i6, i9 | Installed inside LED cabinets to control LED modules |
| Media Players | A100, A200, A35 | Used in asynchronous LED displays for standalone playback |
In most projects, the computer runs LEDVISION ColorLight software and connects to a sending card through a network or video interface. The sending card then transmits the signal to receiving cards installed in each cabinet.
For standalone LED displays, media players such as A100 or A200 can store programs created in LEDVISION and play them automatically without a continuous computer connection.
4. LEDVISION Download — All Versions and User Manual
To get LEDVISION software safely and quickly. We provide all available versions of Colorlight LEDVISION, from legacy releases to the latest updates.
4.1 Downloading from LedInCloud
- Register LedInCloud or Go to Colorlight Software Download page
- Browse the list of LEDVISION versions: 5.0, 6.0, 7.0, 8.0, and 8.5
- Click the version that matches your hardware
- Download the installer and save it to your PC
This page is regularly maintained to ensure that all files are clean, up-to-date, and compatible with Colorlight controllers.
4.2 Available Versions and Their Uses
4.3 Install the Software
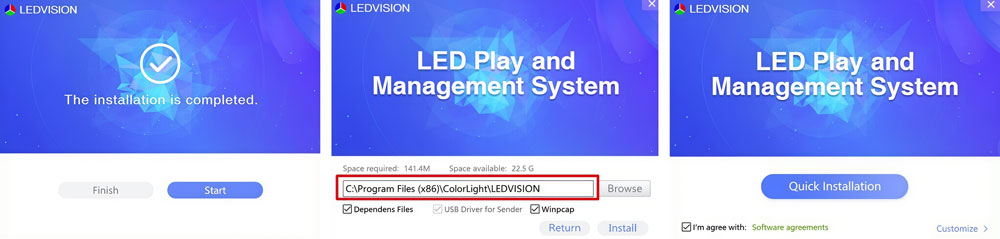
Run the Installer: Click the downloaded .exe file.
Choose Installation Type:
Quick Install: Installs all default components (ideal for beginners).
Custom Install: Select specific tools like calibration modules or language packs.
Select Installation Path: Stick to the default folder unless you need a custom location.
Complete Setup: Click “Finish” and let the software create a desktop shortcut.
4.4 Troubleshooting Installation Issues
If the installer crashes, disable antivirus software temporarily (some flag LEDVISION as a false positive).
For “Missing DLL” errors, install the latest Visual C++ Redistributable from Microsoft’s site.
5. Software Interface Overview
When you open Colorlight LEDVISION, the interface is divided into several main areas. Each area handles a different task, such as creating programs, editing content, or controlling the LED screen.
The main parts of the interface include:
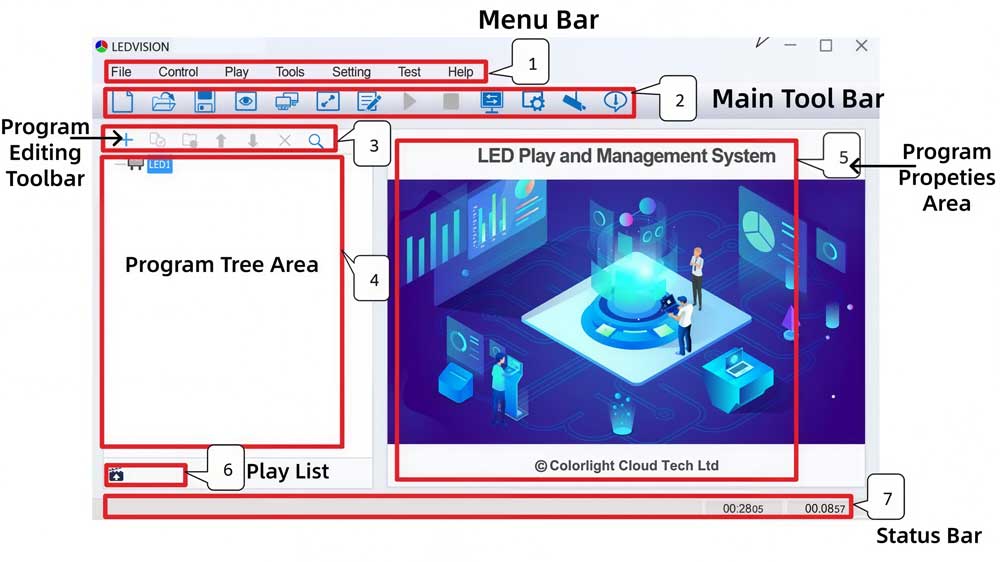
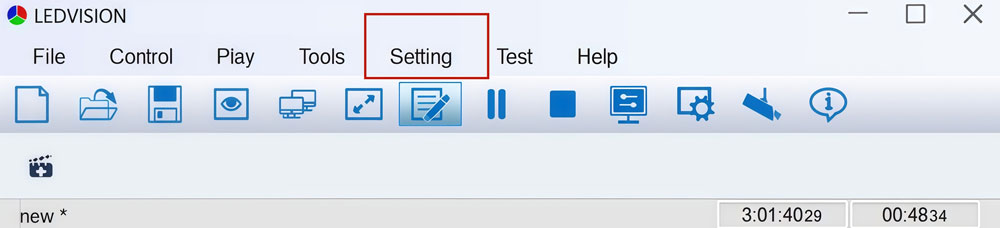
- Menu Bar
Located at the top of the window. It provides access to key functions such as project management, screen configuration, and system tools.
- Program Editing Area
This is the central workspace of the software. Users create display programs here and design how the content appears on the LED screen.
- Content Panel
This panel allows users to add different types of media to the program. Common options include text, images, videos, clocks, and other display elements.
- Program List
Displays all created programs and pages. Users can quickly switch between different display programs and manage their playback order.
- Control and Status Area
Usually located at the bottom of the interface. It shows connection status and allows users to send programs from ledvision colorlight to the LED controller.
Once you understand these sections, navigating Colorlight LEDVISION becomes much easier.
6. How to Use LEDVISION for LED Screen Control?
Below is a detailed, step-by-step guide to mastering LEDVISION for seamless LED display management.
Step 1: Set Up Your LED Screen Dimensions
Before creating content, ensure your software matches your physical screen size.
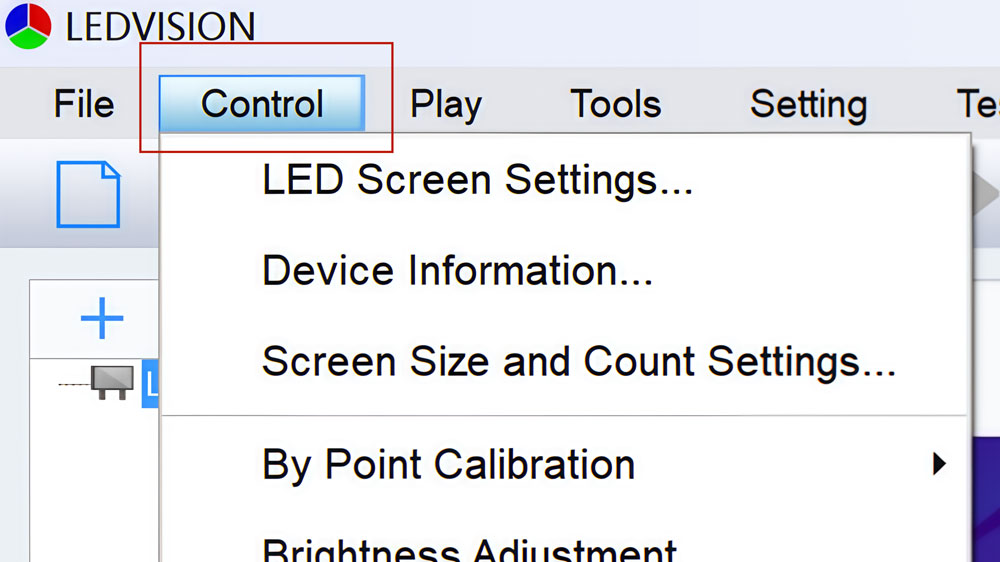
✔ Open LEDVISION and navigate to Control > Screen Size and Count Settings.
✔ Input the pixel dimensions of your LED screen (e.g., 1920×1080).
✔ For multi-screen setups, define each screen’s position (e.g., Screen 1: Left, Screen 2: Right).
Pro Tip: Use the same resolution as your LED hardware to avoid stretched or blurry content.

Step 2: Create Program Pages & Windows
Program pages organize your content, while windows define where it appears.
(1) Add a Program Page:
✔ Right-click your screen in the Program Tree Area (left panel) > New Normal Page.
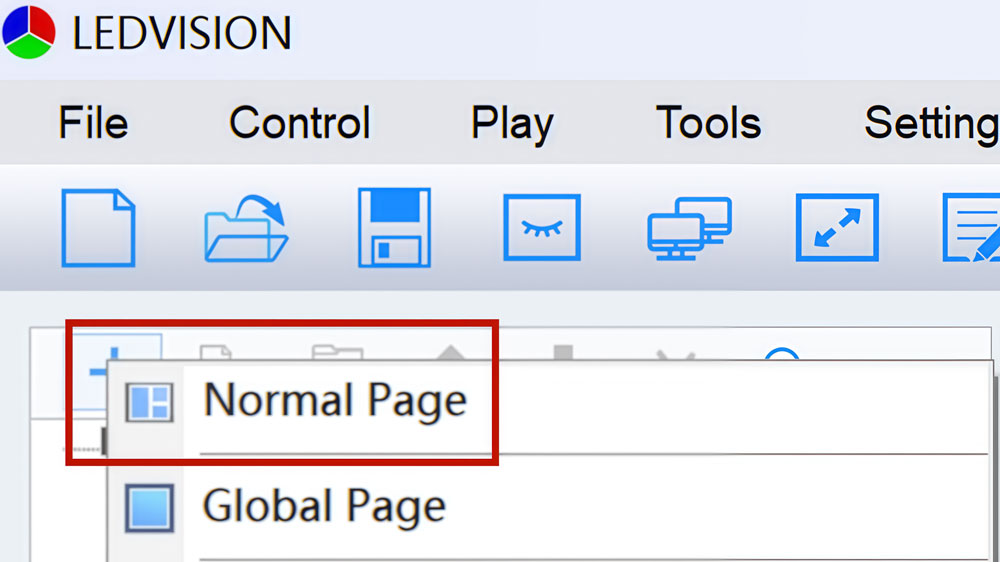
✔ Use Global Pages for fixed elements (e.g., clocks, logos) that stay visible across all content.

(2) Add a Program Window:
✔ Right-click the program page > Add File Window.
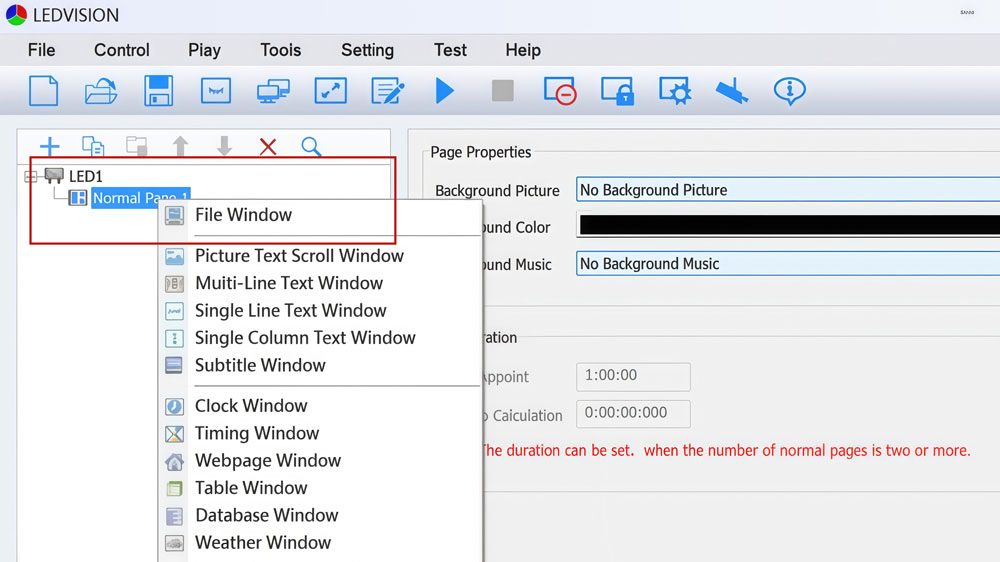
✔ Drag the window borders to adjust its position and size on the preview screen.

✔ Example: Create a video window (top half) and a text ticker (bottom half).
Step 3: Add and Edit Content
A. Videos & Images
✔ Right-click a File Window > Add Video/Image.

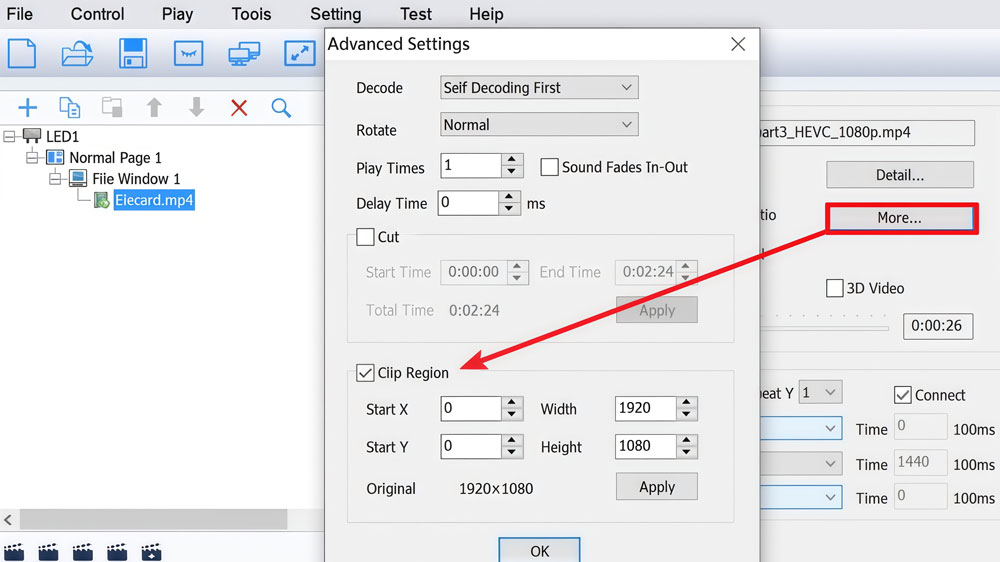
✔ Adjust properties in the right panel:
- Crop Black Borders: Under Video Properties > More > Cut.
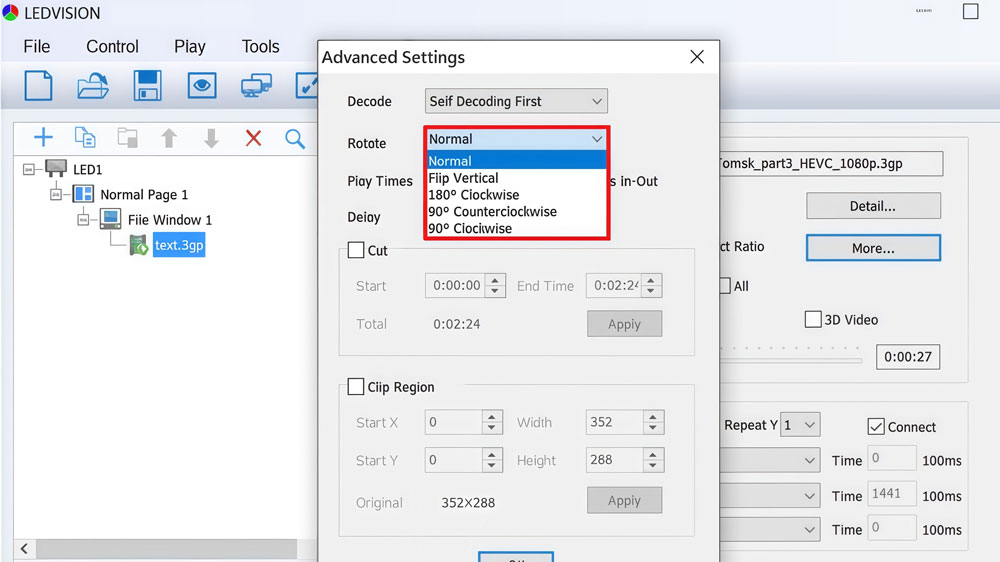
- Rotate Content: For vertical screens, use Rotate 90° in image/video settings.

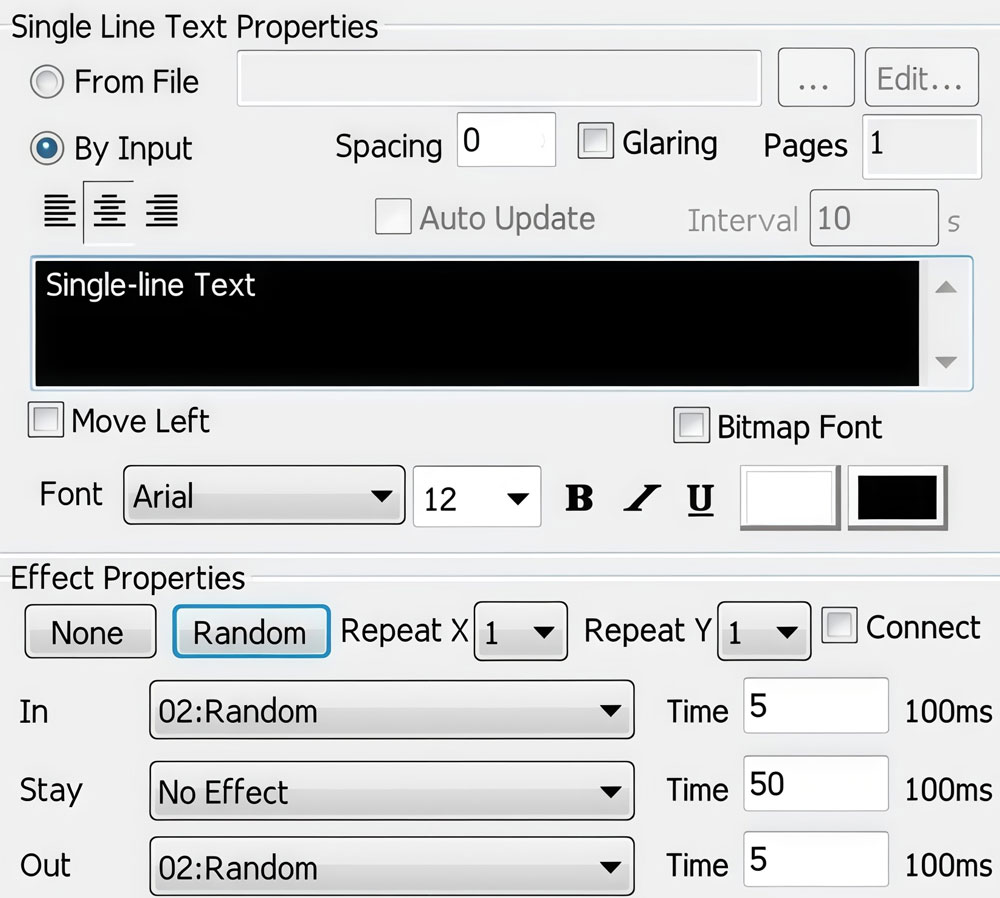
- Transitions: Apply fades, slides, or 3D effects under Effect Properties.

B. Text & Subtitles
✔ Add a Single-Line Text Window for scrolling notifications.
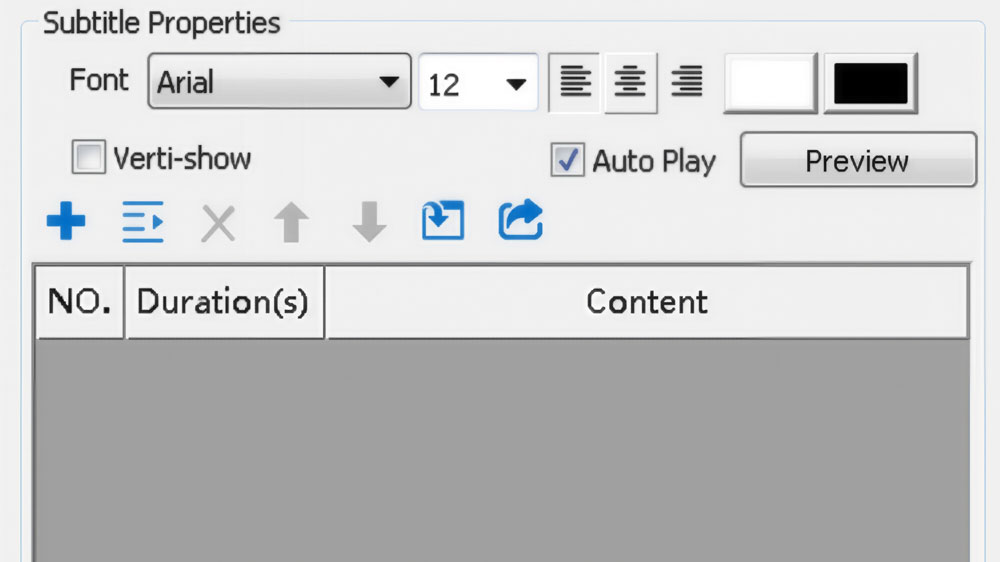
✔ Use Subtitle Window to overlay captions on videos: Import .txt or .lrc files and adjust font/position.
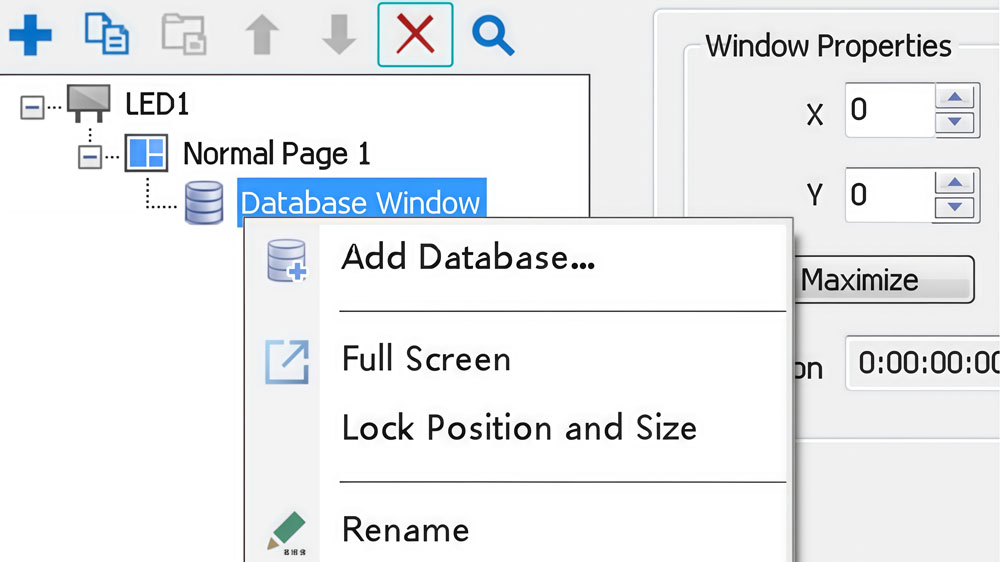
C. Live Data
✔ Database Integration:
- Add a Database Window > Select Oracle, SQL, or Excel files.
- Set refresh intervals to display real-time stats (e.g., sales numbers).
✔ Weather Feeds:
- Add a Weather Window > Enter a city name for live forecasts.

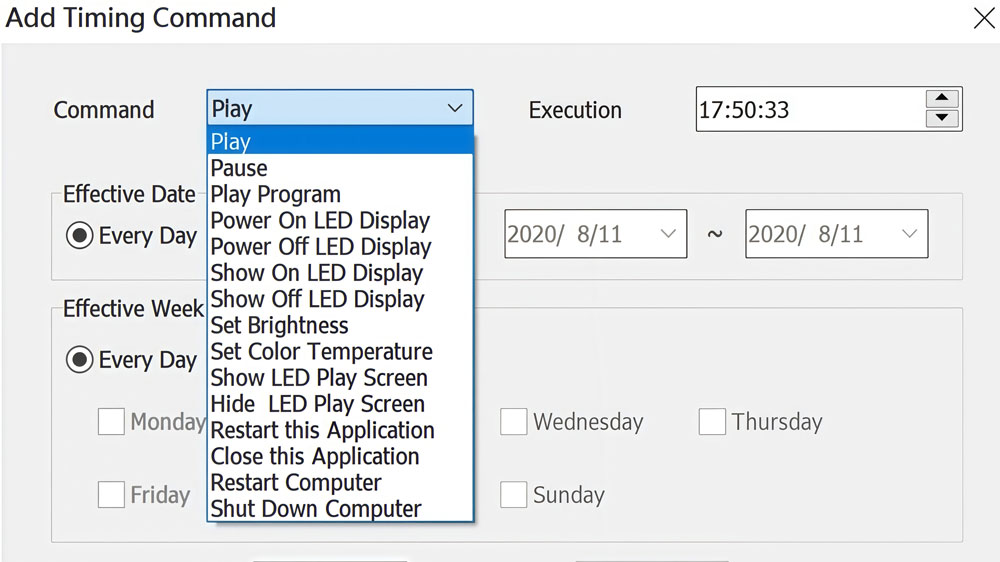
Step 4: Schedule Automated Playback
Automate tasks like turning screens on/off or switching playlists.
✔ Go to Control > Timing Command List.
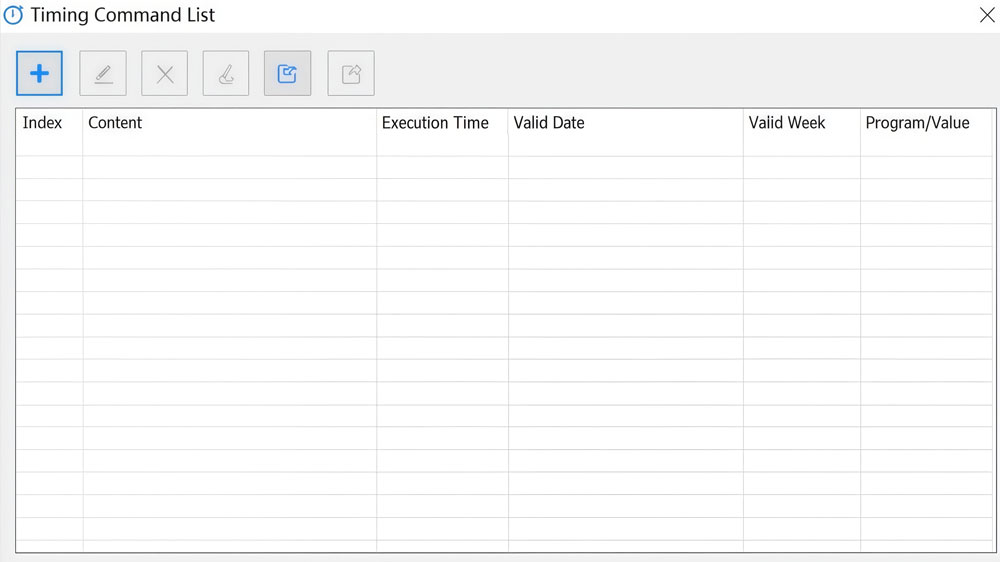
✔ Click Add and set:
- Action: “Turn on screen,” “Play Program 1,” or “Adjust brightness.”

- Time: Specify exact execution times (e.g., 8:00 AM daily). Save the schedule—no manual intervention needed!
Step 5: Troubleshoot Common Issues
✘ Problem: Video/Office files won’t play.
Fix: Install Microsoft Office (WPS isn’t supported) and update video codecs.
✘ Problem: Icons are grayed out.
Fix: Go to Settings > Play Mode > Normal Play Mode.
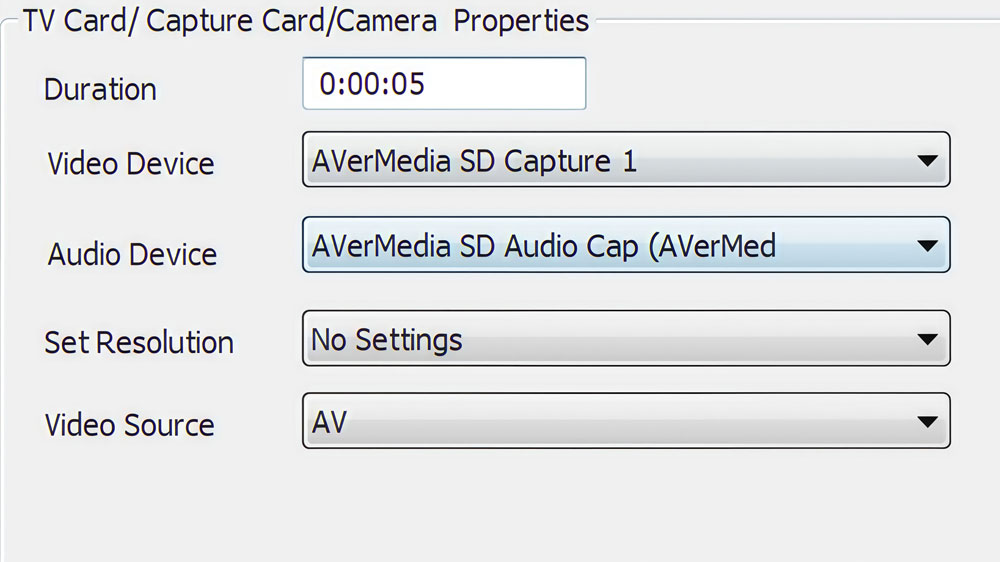
✘ Problem: External video feed is distorted.
Fix: In Video Capture Window > Set Resolution, match the source device’s output.
Step 6: Advanced Tips for Professionals
✔ Multi-Layer Effects:
Use Opacity settings to blend videos with text or logos.
✔ Real-Time Adjustments:
During playback, right-click the preview screen to switch pages or freeze content.
✔ Offline Playback:
Send content to receiver cards via Control > Offline Play for standalone operation.
7. FAQ
Q: Is Colorlight LEDVISION free to download?
Yes, LEDVISION is free. You don’t need a license to install or use the software. Just download the version that matches your hardware and run the installer.
Q: Which LEDVISION version should I use?
It depends on your hardware. Older sending cards like the S2 or S4 work best with V5.0–V7.0. If you’re using newer hardware such as the X4 or Z6, go with V8.0 or above. When in doubt, contact us.
Q: Does LEDVISION work on Mac or Linux?
No. LEDVISION only runs on Windows (7, 8, 10, and 11). There is no Mac or Linux version available.
Q: Can I control multiple LED screens at the same time?
Yes. LEDVISION supports multi-screen control from a single computer. You can manage each screen independently or run them in sync, depending on your setup.
Q: Why isn't my sending card being detected?
First, check that the USB or Ethernet cable is properly connected. Then make sure your LEDVISION version is compatible with your sending card model. Reinstalling the driver usually fixes this — you’ll find the driver in the software installation folder.
Q: Do I need Microsoft Office installed to play PPT files?
Yes. LEDVISION relies on Office to render PowerPoint and Excel content. If Office isn’t installed, those file types won’t play. PDF and image formats work without it.
8. Conclusion
Colorlight LEDVISION is a powerful and flexible software platform for anyone managing LED displays. It combines ease of use with deep control features, making it suitable for both first-time users and experienced engineers.
To get started, pick the version that fits your hardware, download from LedInCloud, and follow the basic setup steps. With LEDVISION, managing your LED screen becomes a smoother, more efficient process.