
When you’re working with NovaStar LED screen configuration, things don’t always go smoothly. From resolution mismatches to receiving card issues, even a small error can make the whole screen go dark or display incorrectly.
This FAQ covers the most common problems users face when configuring LED screens with NovaStar LED control system, especially through NovaLCT and NovaLCT Mars. Whether you’re doing a nova star led setup or troubleshooting a NovaStar receiving card configuration, these answers can help you fix issues faster.
Free NovaStar Software & Resources
Need tools or firmware for your LED display system?
LedInCloud provides free access to NovaStar Software, including:
- NovaLCT and NovaLCT Mars software downloads
- Receiving card configuration files
- Firmware and FPGA data packages
- Register LedInCloud now to access all NovaStar resources for free.
LedInCloud helps LED professionals simplify configuration and get the latest NovaStar tools without the hassle.
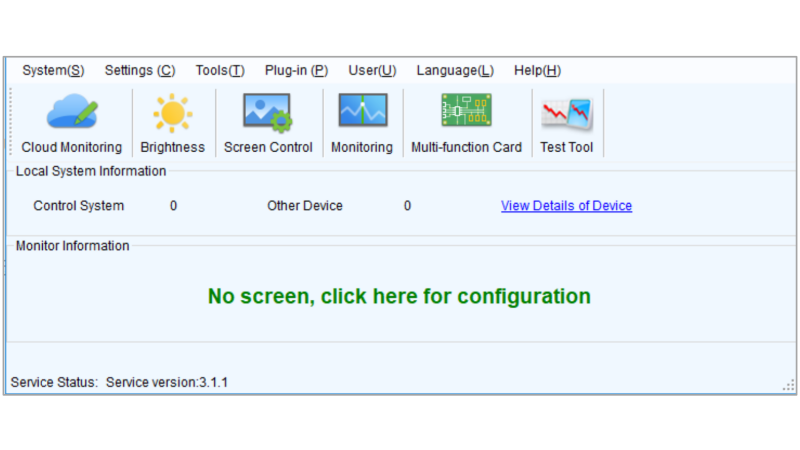
Frequently Asked Questions about Novastar NovaLCT Screen Setup
Q1: Why does the screen display incorrectly during Smart Configuration?
This usually happens when the resolution settings don’t match, or the receiving card configuration isn’t correct.
Steps to check:
- Go to the Sending Card page in NovaLCT and compare the sending card resolution with the graphics card output resolution. If they are different, set them to the same value.
- If the resolutions already match, open the Smart Configuration Wizard and check the following:
Whether pixel width and height match the actual cabinet size
Whether scan type and module size are set correctly
Whether the correct receiving card configuration file is loaded
A mismatch in any of these settings can cause the screen to show incorrect images, only light up partially, or stay black.
Q2: Why does NovaLCT Mars show “No Hardware”?
This means the software cannot detect any connected control hardware.
How to troubleshoot:
- Make sure all hardware devices (sending cards, receiving cards, controller box) are powered on.
- If you’re using a synchronous system, check whether the USB to serial cable is properly connected to the computer.
- Confirm that the USB serial driver is installed correctly on your system.
This error appears when communication between the PC and control system fails completely.
Q3: Why does NovaLCT show “No Screen Info”?
This usually happens when the screen mapping data is missing or not properly configured.
Steps to handle it:
- If the screen was configured before, go to the Screen Connection page in LCT, click Read from Hardware, and then send the SCRFG file to the system again. Be sure to store (solidify) the configuration after sending.
- If this is a new screen, go to the Screen Connection page and build the screen layout manually based on the actual cabinet wiring and installation.
Q4: Why do only part of the modules light up in each cabinet during Smart Configuration?
This usually means the receiving card settings don’t match the actual LED cabinet structure.
What to check:
- Make sure the receiving card’s load configuration (how many modules it controls) matches the physical layout of each cabinet.
- Check the pixel width and height per cabinet set in the wizard. If these numbers don’t match the real cabinet dimensions, only part of the screen will respond.
- Also confirm the scan mode and number of rows/columns per module are correct if your screen uses non-standard modules.
Even one mismatch here can cause modules to stay dark or show a broken image.
Q5: What should I do if an “Error Notice” pops up while running NovaLCT?
This usually means the software has encountered a system or hardware error.
- If your computer is connected to the internet: click Send Error Report and contact NovaStar support.
- If your computer is offline: click View Error Data, then copy the error details into a TXT file. Save the file and send it to NovaStar’s technical team manually.
If you have any questions, you can also contact the LedInCloud technical team – a leading LED Screen Cloud Platform. We are always ready to solve your problems.
Q6: What do the indicator lights on the receiving card mean in a synchronous system?
The status lights on NovaStar receiving cards help indicate whether the card is working normally.
Common meanings:
| Indicator Light | Status | Meaning |
| Red Light | Steady On | Receiving card has normal power supply. |
| Off | Receiving card has no power supply. | |
| Green Light | Steady On | Receiving card is receiving signal. |
| 1Hz Flashing (once per second) | Normal operation; image data is from the primary channel. | |
| 2Hz Flashing (twice per second) | Normal operation; image data is from the secondary channel (redundancy mode). | |
| 7Hz Flashing (rapid flash, ~7 times per second) | Receiving card is in boot mode (firmware update unsuccessful). | |
| 0.2Hz Flashing (once every 5 seconds) | Network port or device connection issue. | |
| Pattern: Flashes rapidly 3 times, pauses 0.5s, repeats | Connected to sending card normally, but no DVI signal input detected. |
Q7: What do the indicator lights on the sending card mean in a synchronous system?
Indicator lights on the sending card provide real-time feedback on signal and hardware status.
Typical behavior:
| Indicator Light | Status | Meaning |
| Green Light | Normal Flashing: 2.98Hz (once per ~0.35s) | FPGA operating normally |
| Fast Flashing: ~23.8Hz (once per ~42ms) | Showing boot screen | |
| Slow Flashing: ~0.37Hz (once per ~2.75s) | Showing “No Signal” screen (No DVI input) | |
| Steady Off | FPGA not working, or keypress timeout (Note: Interpretation based on context) | |
| Red Light | Steady On | Normal operation (functions as power indicator) |
| Fast Flashing: ~20Hz (once per ~50ms) | Keypress timeout state (Note: Interpretation based on context), with Green light flashing |
Q8: Why can’t NovaLCT Mars detect the light sensor?
When the software doesn’t detect the ambient light sensor, it’s usually a connection or configuration issue.
What to check:
- Make sure the USB cable from the sending card is connected properly
- Confirm the light sensor is plugged into the correct port on the multifunction card or sending box
- In NovaLCT, open the multifunction card interface and add the sensor via serial or network connection as appropriate
Improper connection or unregistered sensors will not appear in the interface.
Q9: Why does the software show a warning saying “Crossing Two DVI Signals” during screen connection setup?
This happens when the total screen resolution exceeds the video input resolution.
What to do:
- Use a video source with a higher resolution if possible
- Alternatively, configure the screen using multiple video inputs or adjust cabinet mapping to fit within one DVI channel
- Double-check that the total pixel width and height in the screen layout are correct and not over the limit of a single signal channel
Q10: Why does the backup setting for multiple sending cards not work?
If your backup sending card setup isn’t working, it’s usually due to a mismatch in the control system topology.
Suggestions:
- Review the screen connection layout and ensure it reflects the same master-slave controller relationship shown in your backup setup
- Backup only works when the primary and secondary controllers are linked exactly as defined in the configuration
Q11: Why is the USB serial port connected but the device still isn’t found?
This happens when the USB driver is missing, or the port isn’t working properly.
What to do:
- Reinstall the NovaStar USB serial driver and try again
- Try connecting the USB cable to a different port on the computer
- In the system settings, check whether the correct port is enabled and recognized by the software
Q12: Why does the screen freeze or show a default image when the network cable or DVI signal is disconnected?
When the signal is lost, the controller will freeze the screen or switch to a preset display depending on the configuration.
To adjust this:
- In NovaLCT, go to Tools > Pre-stored Image Settings
- Choose what the screen should display when the signal is interrupted.
Q13: Why doesn’t my computer automatically enter clone mode when connected to the sending box via DVI?
This usually depends on your operating system and graphics settings.
Try the following:
- Check if the graphics driver is correctly installed
- On Windows XP, open the NVIDIA or CCC control panel and manually setup
- On Windows 7 or later, the system usually clones the DVI signal automatically when connected
Q14: Why does the screen image shift or move when I use the mouse, even after Smart Configuration?
This means the sending card resolution doesn’t match the graphics card resolution.
Fix it this way:
- Go to the Sending Card settings in NovaLCT
- Adjust the sending card resolution to match the graphics card output resolution exactly
Q15: Why does updating the FPGA for sending and receiving cards have no effect?
If the update doesn’t work, it may be due to a mismatch in the selected upgrade file or card type.
Check these points:
- Confirm the exact model of both the sending and receiving cards
- In the Data Package List in NovaLCT, select the file that matches your hardware
- Then try updating again
Q16: Why doesn’t anything change on the modules status during Smart Configuration?
This usually means the parameters in the configuration wizard don’t match the actual cabinet design.
Check the following settings:
- Data type: Serial or parallel
- IC type: Choose the correct chip based on the actual LED module
- OE polarity: High or low active (usually default is fine)
- Module type: Standard or irregular
- Pixel count: Set the correct width and height of each module
- Data group count: Set as “unknown” if unsure
- Row decoding mode: e.g. 74HC138, static, or passthrough
- Scan mode: Set according to the actual LED module scan
- Module load size: Typically 1 row × 1 column
- Module cascading direction: Match the real connection direction
Q17: Why do import, export, or sending operations for receiving card files fail?
These failures are often caused by poor cable connections or unsupported file structures.
Try the following:
- Make sure the USB or Ethernet cable is properly connected
- If the current file doesn’t match the actual cabinet structure, try loading a correct one first
- For irregular-shaped screens, use a NovaLCT version that supports export of irregular configurations
- If the problem persists, try changing the sending card
Q18: Why is the screen still dim during RGB single-color testing at brightness level 255?
This usually means the brightness gain setting is too low.
What to check:
- Go to Brightness > Screen Adjustment in NovaLCT, check the gain percentage setting
- Increase the value as needed until the modules reach the expected brightness
Q19: Why is the screen not responding even though the system and hardware seem to be working?
This could be due to the screen being locked in the control panel.
Try this:
- Open the Screen Control section in NovaLCT
- See if the screen is set to “Locked”
- If it is, disable the lock setting
Q20: Why can’t the monitoring system send email alerts to a specified address?
This usually happens due to basic network or setup issues.
Check the following:
- Make sure the email address is entered correctly
- Confirm that the control PC is connected to the internet
- Make sure the system time is correct, as mismatched time may cause send failures
Q21: Why can't I debug the screen in no-sending-card mode?
To use NovaLCT without a sending card, certain hardware and software requirements must be met.
Make sure of the following:
- Your receiving card must be MRV300 or above
- NovaLCT software version must be V4.4.0 or newer
- The required USB driver and WinPcap 4.1.3 must be installed on the computer
- In NovaLCT, select the correct gigabit Ethernet port under “Current Operating Communication Port”
Q22: Why is brightness uneven across different cabinets, or why do some areas flicker at low brightness?
This often happens due to differences in receiving card settings or firmware versions.
What to check:
- The receiving card configuration may not be consistent across all cabinets. Try reading the config from one working cabinet, then send it to all receiving cards.
- The FPGA firmware versions may be different. Make sure all receiving cards are running the same FPGA version, and update them if needed.
- If you notice flickering or noise at low grayscale, check whether the system is installed in a strong electromagnetic environment.
- Relocate or shield the system if necessary.
NovaStar NovaLCT screen configuration can seem complex, especially when you’re dealing with receiving card parameters, firmware versions, or unexpected signal issues. But in most cases, the problems are caused by a few common missteps—incorrect resolutions, mismatched config files, or overlooked firmware differences.
This guide covers 22 real problems that installers and engineers often face, along with clear steps to fix them. Whether you’re using NovaLCT or LCT Mars, a solid understanding of your system layout and the right troubleshooting habits can save you hours of guesswork.
For tools, firmware, and updated configuration files, don’t forget—LedInCloud offers free access to NovaStar Software. Contact LedInCloud and take the headache out of LED control.