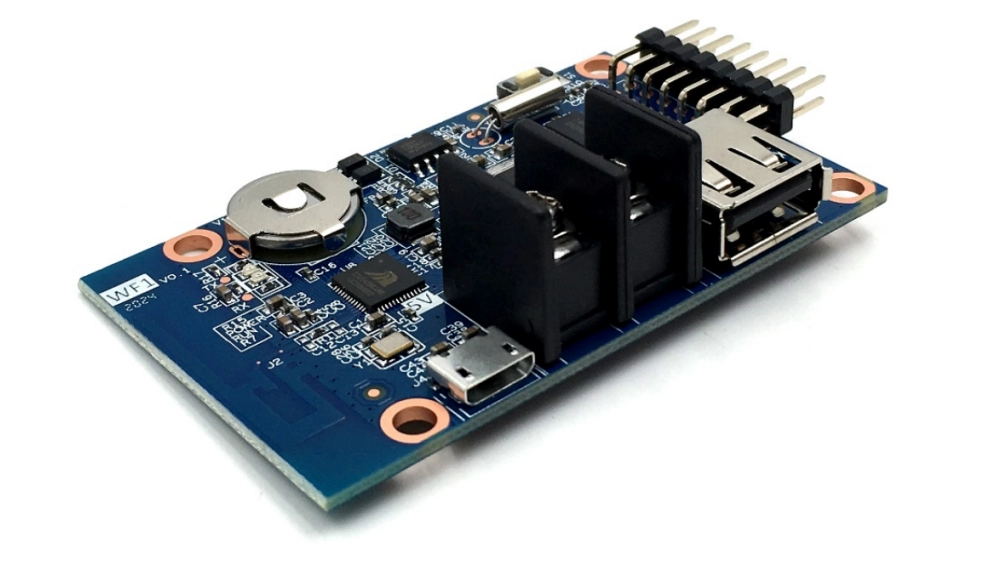
Huidu HD WF1 isn’t just another LED control card. It’s small enough to fit in your hand, yet it can drive bright, colorful HUB75 displays with text, animations, and live updates. You can change what’s on the screen straight from your phone or laptop, without touching the sign. For shop owners and display makers, it’s a way to keep content fresh every day without climbing a ladder or dealing with tangled cables.
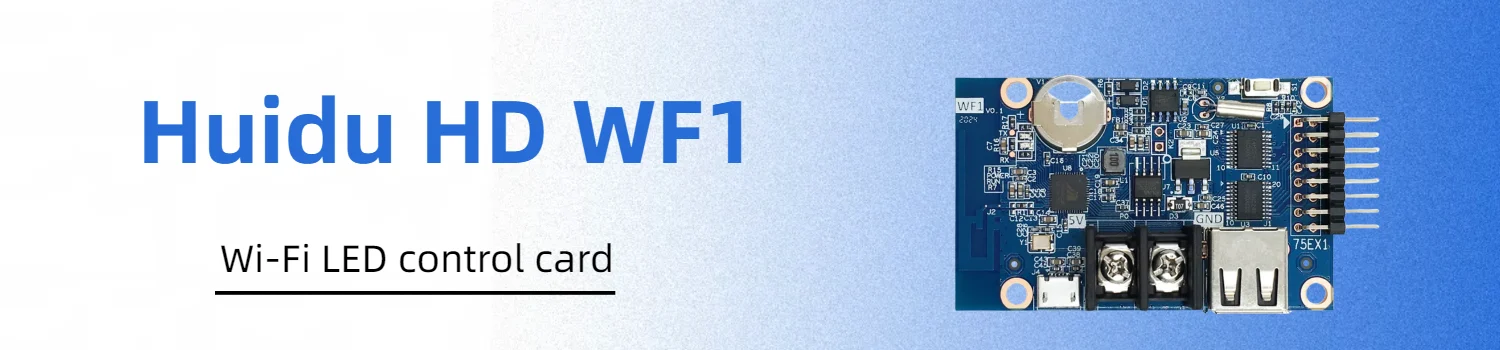
1. Huidu HD WF1 Introduction
The Huidu HD WF1 is a Wi-Fi LED control card made for HUB75 modules. It’s built to handle compact displays, from shop signs to small indoor boards. The card supports a range of display modes, including colorful text, simple graphics, and scheduled content. It works with Huidu’s PC and mobile software, so you can manage it from different devices. Power comes through a Micro USB or a standard 5V terminal, giving you flexibility in installation.
2. Why the HD WF1 Stands Out?
The Huidu HD WF1 controller stands out because it mixes useful features with an easy workflow. Here’s what makes it different:
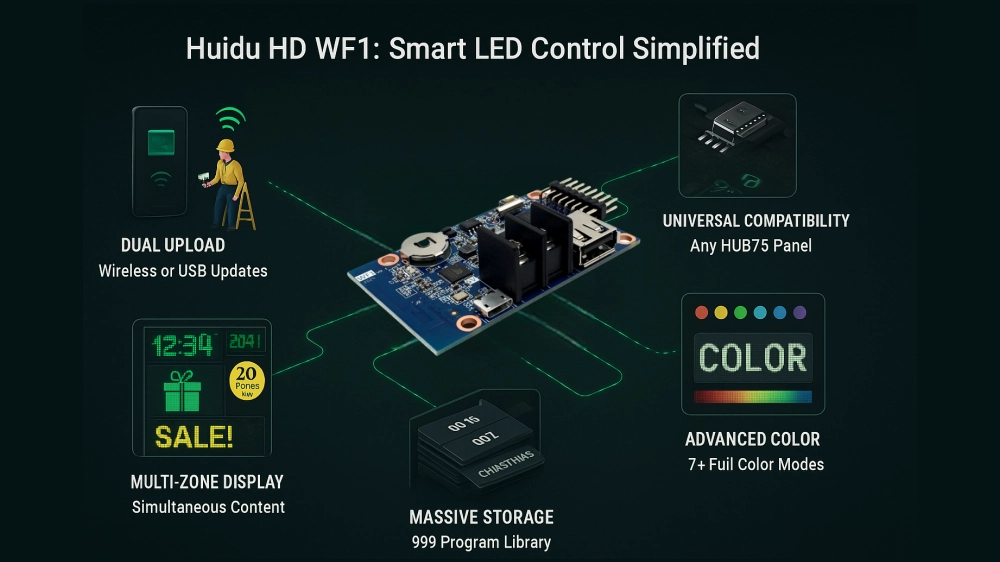
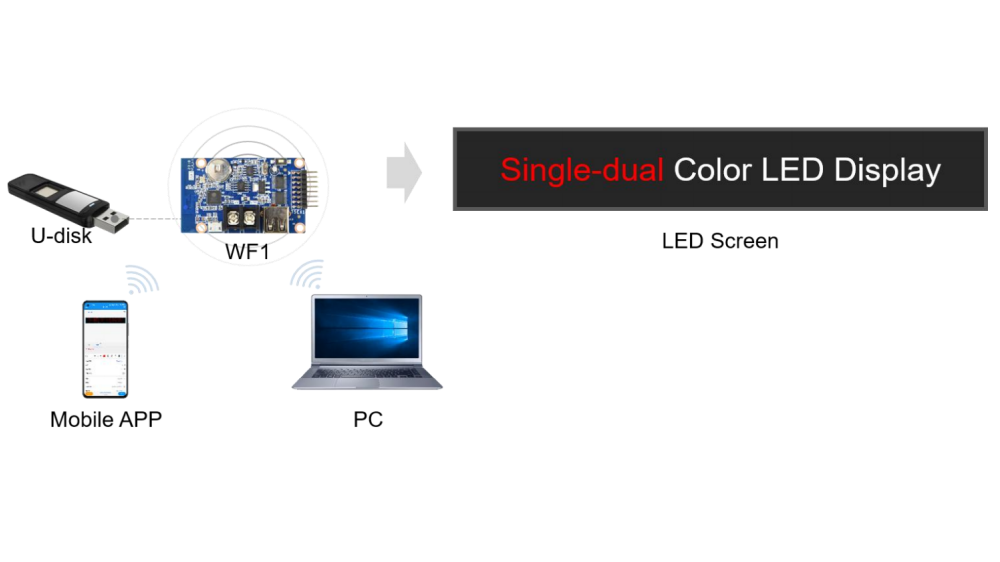
2.1 Two Ways to Update Content
Send programs wirelessly through its built-in Wi-Fi, or use a USB drive. If the display is mounted high, you can update it from your phone without climbing up. When you’re on site, just plug in a USB for quick changes.
2.2 Wide Module Compatibility
Works with HUB75 full-color modules, including the 2038S chip. You can use panels you already have or source new ones without worrying about fit or format.
2.3 Multiple Zones on One Screen
Supports up to 20 separate display areas. Show an animated promotion in the center, keep a clock running in the corner, and add a scrolling message at the bottom—all at once.
2.4 Rich Color Options
Offers both seven-color and full-color modes with up to eight grayscale levels. Text looks sharper, animations move more smoothly, and colors pop even on small displays.
2.5 Large Program Capacity
Stores up to 999 programs. Prepare seasonal messages, sales events, and holiday greetings ahead of time, then activate them when needed.
These features let you treat a small LED screen like a flexible, living display instead of a static sign.
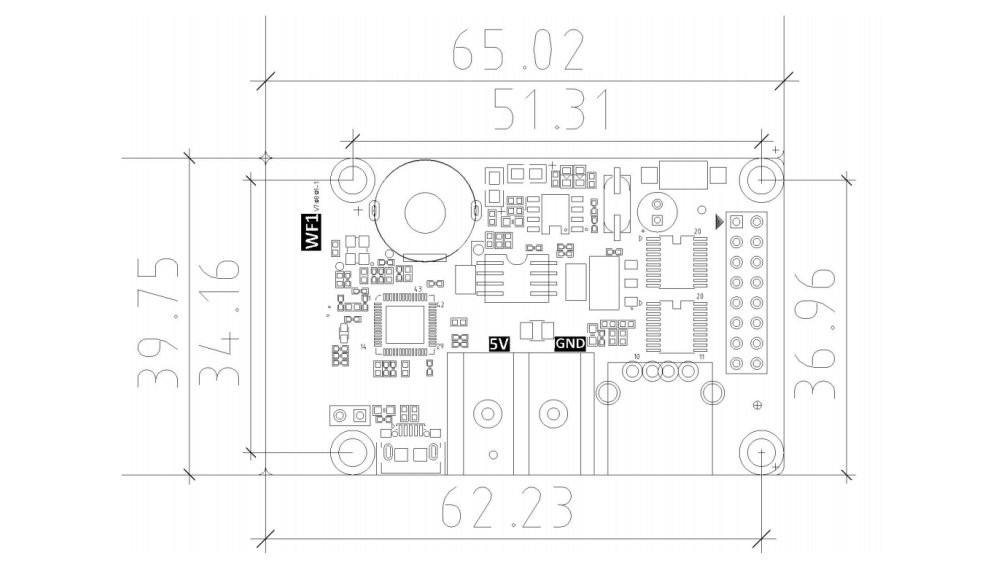
3. Technical Specifications
Before choosing a control card, it helps to know what’s inside and what it can handle. The Huidu HD WF1 packs a lot into a small board, from flexible power options to broad module support. Here’s a closer look at the core specifications and what they mean in practice:
| Specification | Details | What It Means for You |
| Working Voltage | DC 4.2V – 5.5V | Works with common 5V LED power supplies. Easy to integrate into existing setups. |
| Operating Temperature | -40℃ to 80℃ | Stable in both cold and hot indoor environments. |
| Humidity Range | 0 – 95% RH | Can handle damp indoor air without trouble. |
| Storage Temperature | -40℃ to 105℃ | Safe to store in varied climates without damage. |
| Flash Capacity | 1M byte (480K usable) | Holds many programs without frequent deletion. |
| Supported Modules | HUB75, incl. 2038S chip | Works with popular full-color panels. |
| Scanning Method | Static to 1/32 scan | Flexible for different panel types. |
| Max Control Range | 384 × 64 px (max width 640 px) | Fits small signs and narrow banner-style displays. |
| Display Options | Text, animations, GIF, images, SWF, Excel, time, temperature, countdowns | Lets you mix media and live info. |
| Program Zones | Up to 20 zones | Run different content areas on the same screen. |
| Saved Programs | Up to 999 | Pre-load seasonal or event-specific content. |
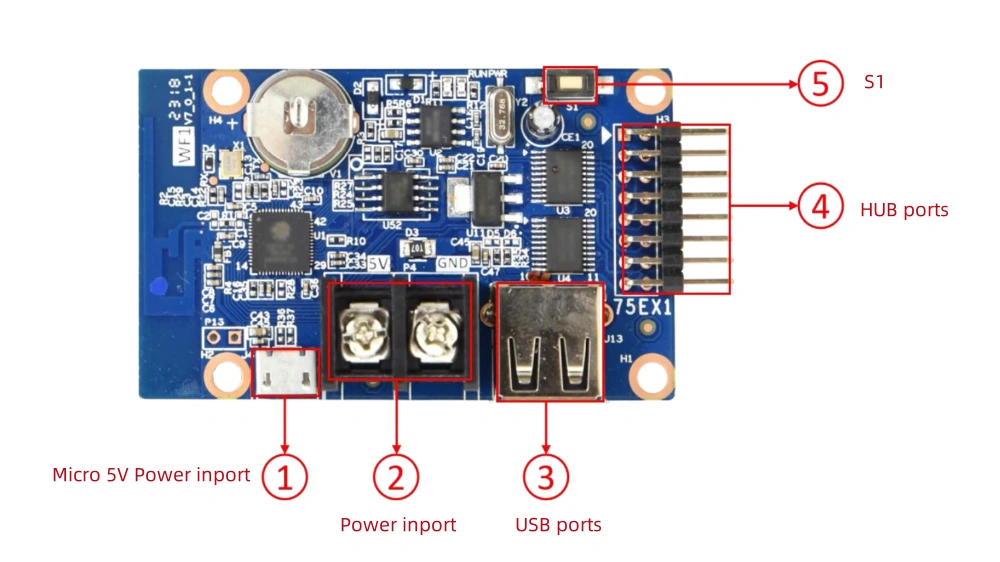
| Power Input | Micro USB or 5V terminal | Choose the most convenient power connection. |
4. HD WF1 Controller Setup Guide
Setting up the Huidu HD WF1 doesn’t need advanced skills. Follow these steps and you’ll have your display running in minutes.
Step 1: Prepare Your Tools
- The WF1 control card
- HUB75 LED module or panel
- 5V power supply (Micro USB cable or terminal block)
- USB drive (if using offline updates)
- Your phone or laptop for Wi-Fi setup
Step 2: Connect the LED Module
- Plug the ribbon cable from your LED module into the WF1’s HUB75 port.
- Make sure the cable is aligned correctly to avoid display errors.
Step 3: Power the Controller
- Use a Micro USB cable or a standard 5V DC terminal to power the card.
- Check that the LED module lights up—this means the card is powered and ready.
Step 4: Choose Your Update Method
Wi-Fi Update:
- Power on the WF1.
- On your phone or laptop, search for the WF1’s hotspot name.
- Connect and open the LedArt app (mobile) or Huidu HDSign software (PC).
- Create your program and send it directly to the card.
USB Drive Update:
- Use the software to export your program to a USB drive.
- Insert the USB drive into the WF1’s USB port.
- Wait for the content to load automatically.
Step 5: Adjust Display Settings
Use the app or PC software to set brightness, schedule on/off times, and apply effects.
If using multiple display zones, assign each area its own content for a richer layout.
Step 6: Test and Finalize
Check for correct colors, smooth animation, and accurate text.
Secure the card and cables so they don’t shift during operation.
With this setup, your WF1 is ready to run continuously, and updates can be made anytime without dismantling the display.
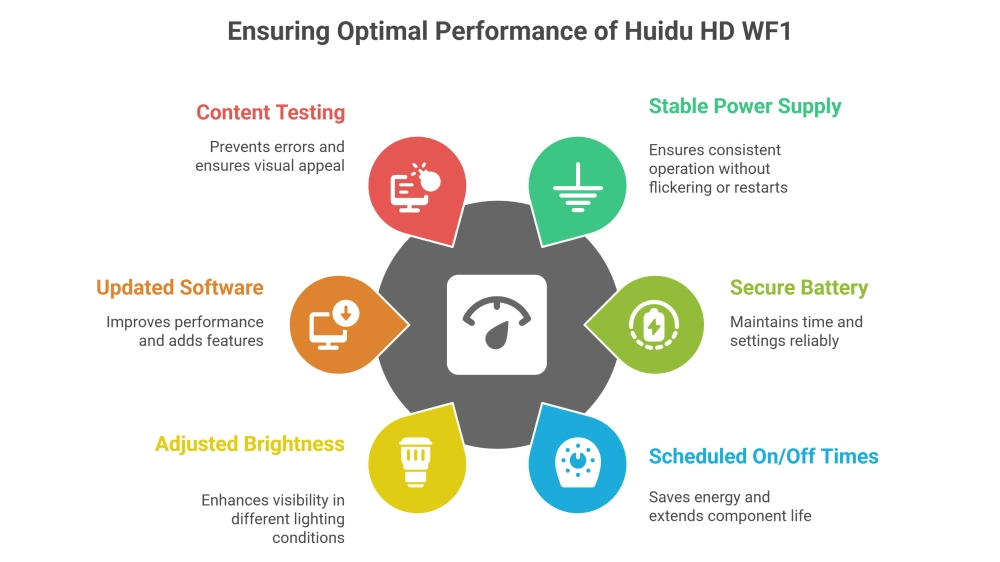
5. Tips for Optimal Performance
To get the best out of your Huidu HD WF1, keep these points in mind:
(1) Use a Stable 5V Power Supply: Fluctuations in voltage can cause flickering or restarts. A quality power adapter will keep the display steady.
(2) Secure the Onboard Battery: This battery keeps time and certain settings. Make sure it’s firmly in place before the operation.
(3) Schedule On/Off Times: Use the timer function to automatically turn the display on in business hours and off at night. This saves energy and extends component life.
(4) Adjust Brightness to the Environment: Lower brightness indoors for comfort; increase it for brightly lit areas to keep content visible.
(5) Keep Software Updated: New versions of Huidu LedArt and HDSign improve performance and add features. Check for updates regularly.
(6) Test Content Before Going Live: Preview animations and layouts to avoid typos, misaligned text, or image distortion.
By following these tips, your WF1 setup will stay reliable, easy to manage, and visually appealing over time.
6. Where to Buy Huidu WF1 and Download Resources?
If you’re ready to try the Huidu HD WF1, the easiest way is through trusted LED display suppliers. For verified products, technical support, and the latest pricing, you can register on our LED Screen Cloud Platform, LedInCloud.
Once registered, you’ll get access to:
- Official software downloads, including HDSign or HD2020 for PC and LedArt for mobile
- User manuals and quick-start guides
- Firmware updates and compatibility lists
- Pricing and availability for the WF1 and other Huidu controllers
- Expert advice on matching the right controller to your LED modules
By using our platform, you won’t have to search across multiple sources for files or support. Everything is in one place, ready whenever you need it.
7. FAQs
- What size LED display can the Huidu HD WF1 control?
It supports up to 384×64 pixels, with a maximum width of 640 pixels for narrow, long displays.
- Can I update content without a USB drive?
Yes. You can use the WF1’s built-in Wi-Fi hotspot and the LedArt app or HDSign software to send programs directly from your phone or PC.
- Is the WF1 compatible with all HUB75 modules?
It works with most HUB75 full-color modules, including those using the 2038S chip.
- How many programs can I store on the WF1?
You can save up to 999 programs, so you can prepare seasonal or event-specific content in advance.
- Where can I download the WF1 software and manuals?
Register LedInCloud to access software downloads, user manuals, firmware updates, and expert support.
8. Conclusion
The Huidu HD WF1 proves that a compact controller can still deliver flexible content, bright visuals, and simple updates. Its dual update methods, wide compatibility, and rich display options make it a strong choice for small business signs, indoor boards, and creative LED projects.