If you’re working with LED displays, chances are you’ve heard of Colorlight Cloud. They’re known for producing reliable LED control systems, and one of their most popular tools is the LEDVISION software. This program helps users manage LED screens by connecting sending cards, configuring screens, and adjusting display parameters.
LEDVISION is used across a wide range of LED applications, including outdoor billboards, indoor rental displays, event backdrops, and stadium perimeter screens. The software works with Colorlight sending and receiving cards, offering stable control and easy setup.
Some of its standout features include:
Auto-recognition of LED modules and sending cards
Real-time preview and screen monitoring
Point-by-point brightness calibration
Support for multi-window video playback
Program scheduling and remote updates
Whether you’re an experienced technician or a new user, LEDVISION offers a mix of advanced features and user-friendly design. Over time, Colorlight has released multiple versions of LEDVISION, each with updates to match new hardware and user needs.
2. How to Download LEDVISION (All Versions)
To get LEDVISION software safely and quickly, you can visit our resources download page: Colorlight Software Download. We provide all available versions of Colorlight LEDVISION, from legacy releases to the latest updates.
Browse the list of LEDVISION versions: 5.0, 6.0, 7.0, 8.0, and 8.5
Click the version that matches your hardware
Download the installer and save it to your PC
This page is regularly maintained to ensure that all files are clean, up-to-date, and compatible with Colorlight controllers.
2.2 Available Versions and Their Uses
LEDVISION 5.0 Download: Best for legacy hardware. It works with older sending cards and provides basic screen control features.
LEDVISION 6.0 Download: Introduced a new UI and improved screen mapping tools. Useful for most mid-range LED projects.
LEDVISION 7.0 Download: Added smarter hardware detection and multi-screen management. Preferred for users handling large screen arrays.
LEDVISION 8.5: The latest version with full support for new sending cards, advanced calibration tools, and a more stable user experience.
2.3 Install the Software
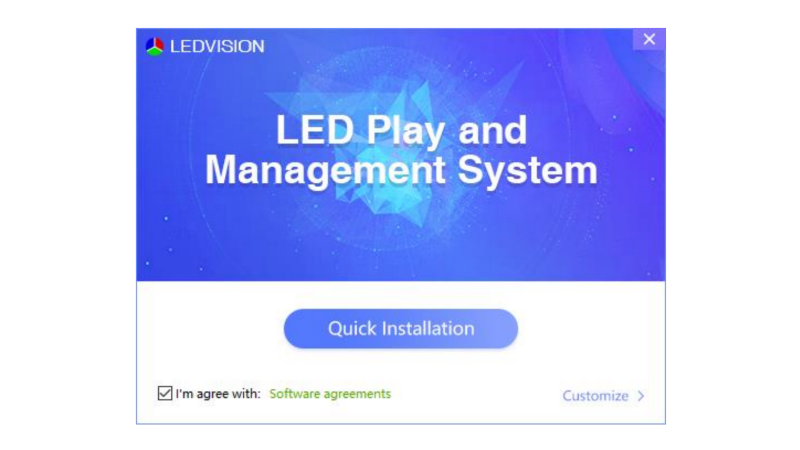
Run the Installer: Click the downloaded .exe file.
Choose Installation Type: Quick Install: Installs all default components (ideal for beginners). Custom Install: Select specific tools like calibration modules or language packs. Select Installation Path: Stick to the default folder unless you need a custom location. Complete Setup: Click “Finish” and let the software create a desktop shortcut.
2.4 Troubleshooting Installation Issues
If the installer crashes, disable antivirus software temporarily (some flag LEDVISION as a false positive). For “Missing DLL” errors, install the latest Visual C++ Redistributable from Microsoft’s site.
3. How to Use LEDVISION for LED Screen Control
Below is a detailed, step-by-step guide to mastering LEDVISION for seamless LED display management.
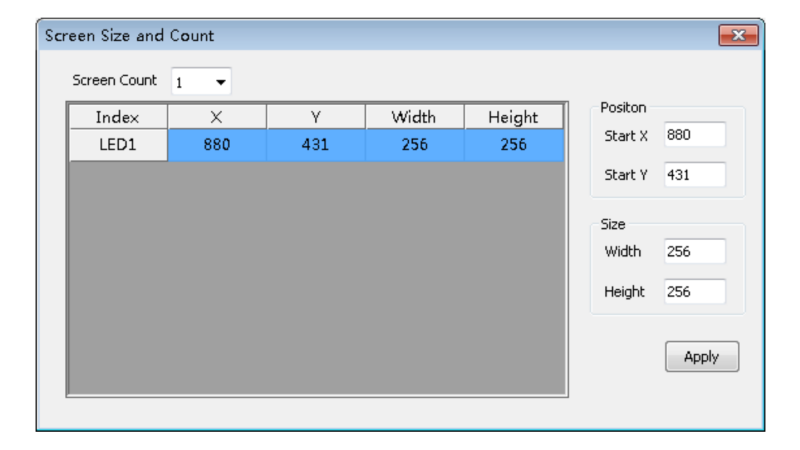
Step 1: Set Up Your LED Screen Dimensions
Before creating content, ensure your software matches your physical screen size.
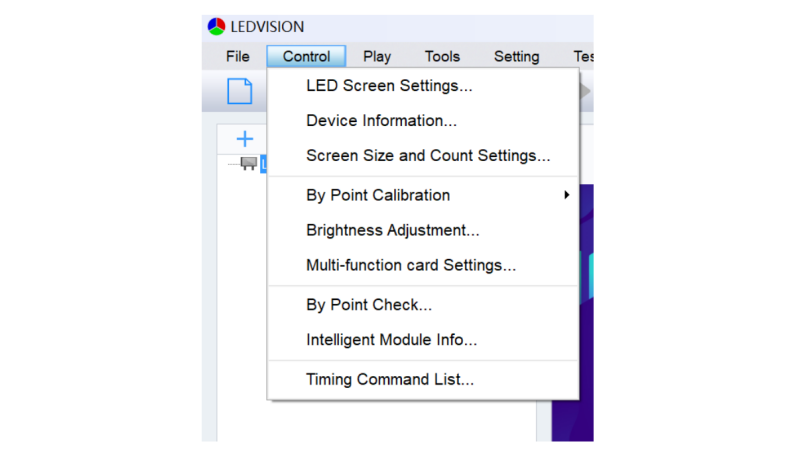
Open LEDVISION and navigate to Control > Screen Size and Count Settings.
Input the pixel dimensions of your LED screen (e.g., 1920×1080).
For multi-screen setups, define each screen’s position (e.g., Screen 1: Left, Screen 2: Right).
Pro Tip: Use the same resolution as your LED hardware to avoid stretched or blurry content.
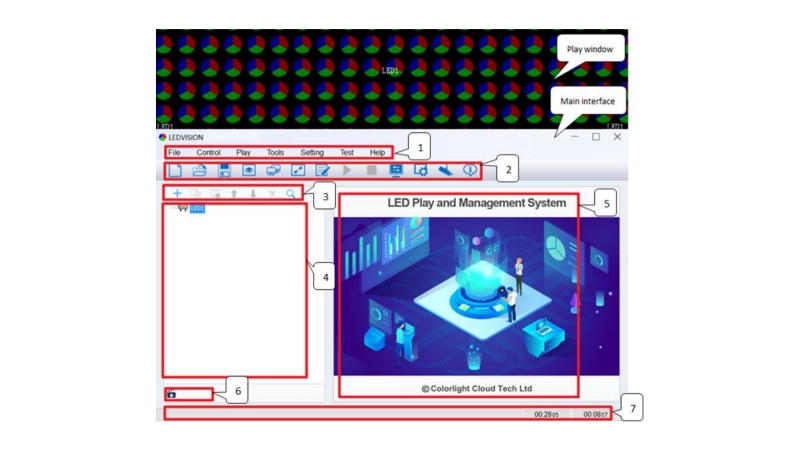
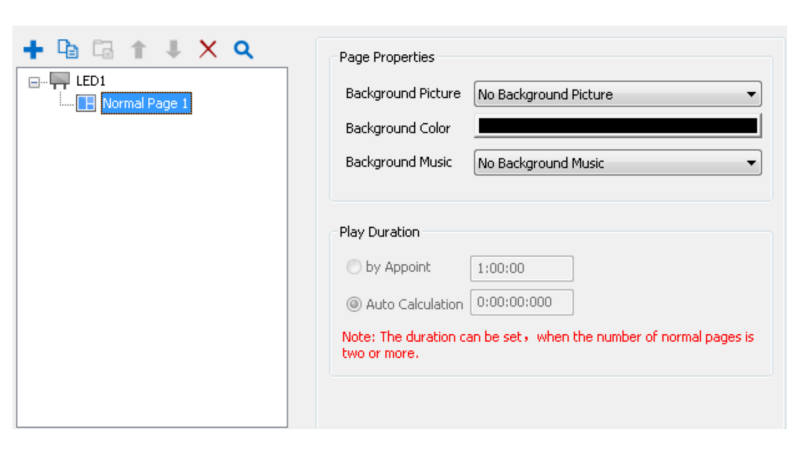
Step 2: Create Program Pages & Windows
Program pages organize your content, while windows define where it appears.
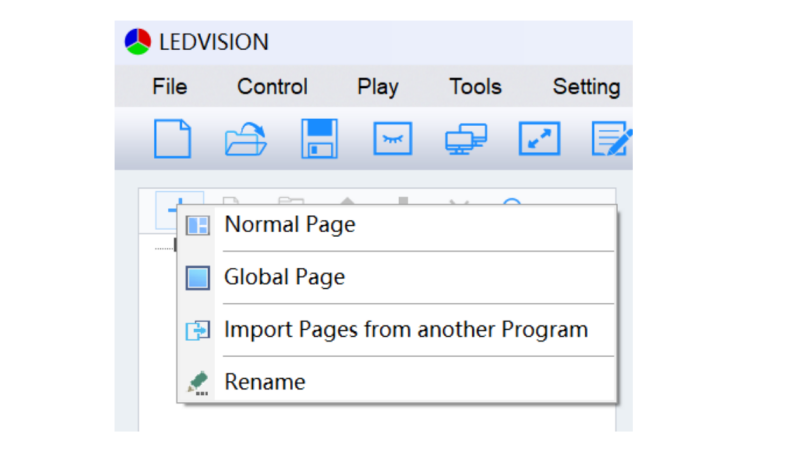
(1) Add a Program Page: Right-click your screen in the Program Tree Area (left panel) > New Normal Page.
Use Global Pages for fixed elements (e.g., clocks, logos) that stay visible across all content.
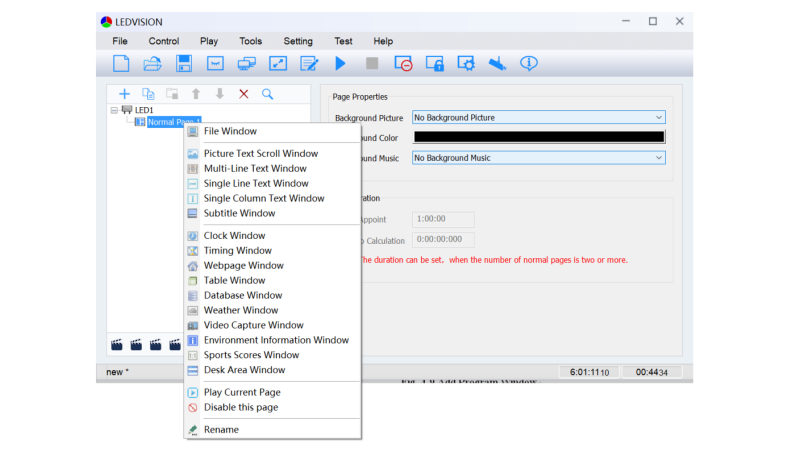
(2) Add a Program Window: Right-click the program page > Add File Window.
Drag the window borders to adjust its position and size on the preview screen.
Example: Create a video window (top half) and a text ticker (bottom half).
Step 3: Add and Edit Content
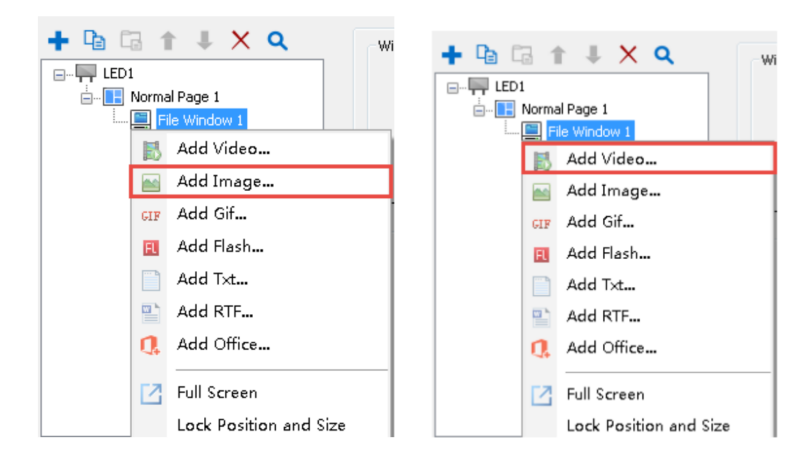
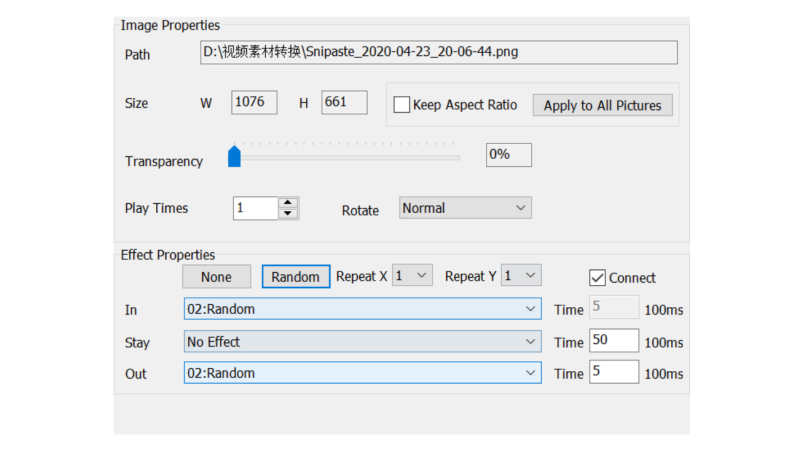
A. Videos & Images Right-click a File Window > Add Video/Image.
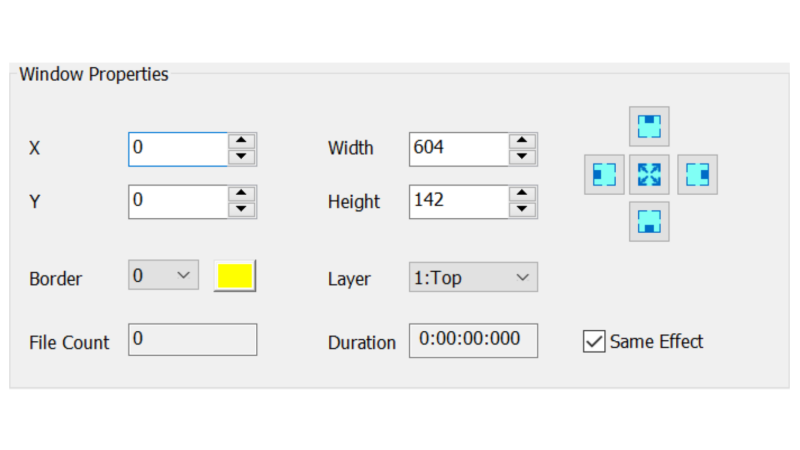
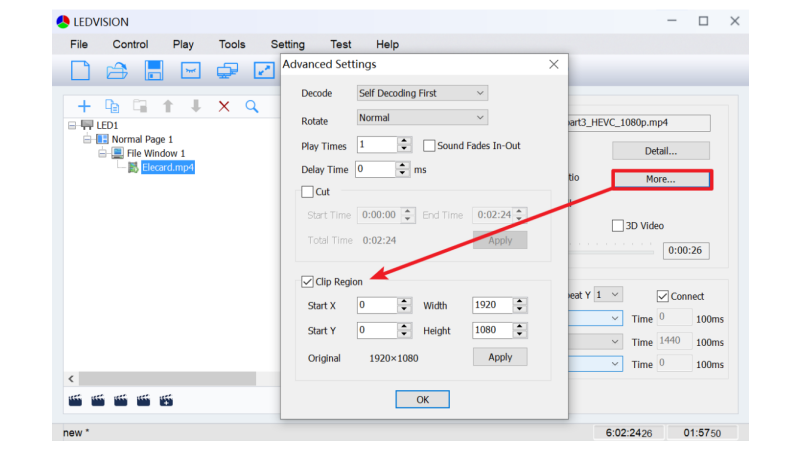
Adjust properties in the right panel: Crop Black Borders: Under Video Properties > More > Cut.
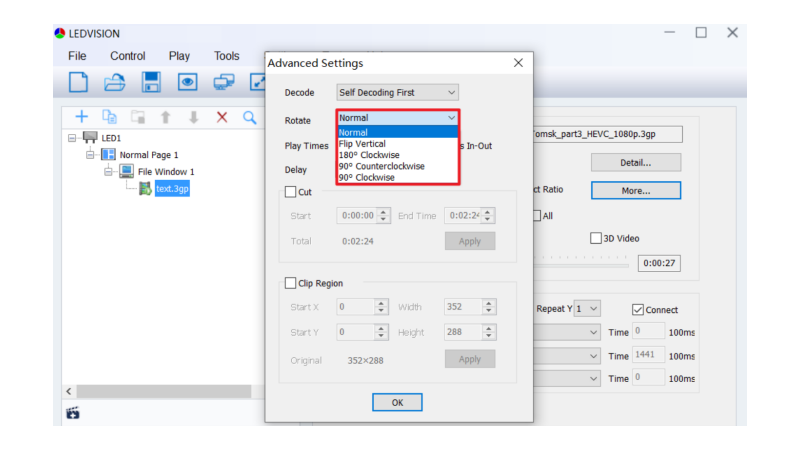
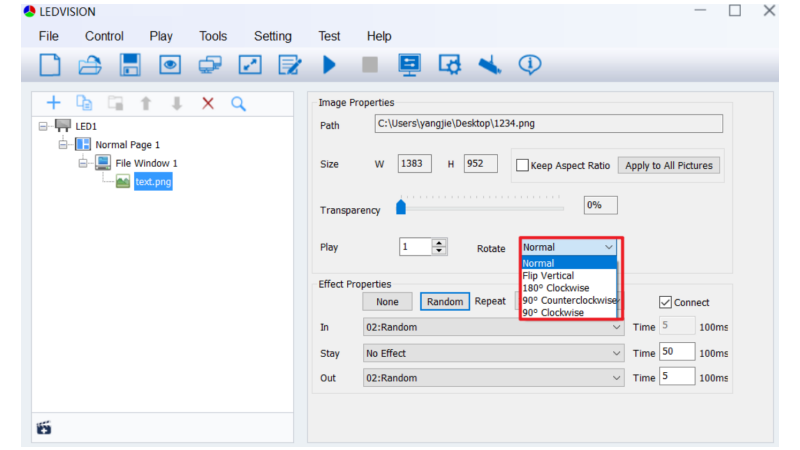
Rotate Content: For vertical screens, use Rotate 90° in image/video settings.
Transitions: Apply fades, slides, or 3D effects under Effect Properties.
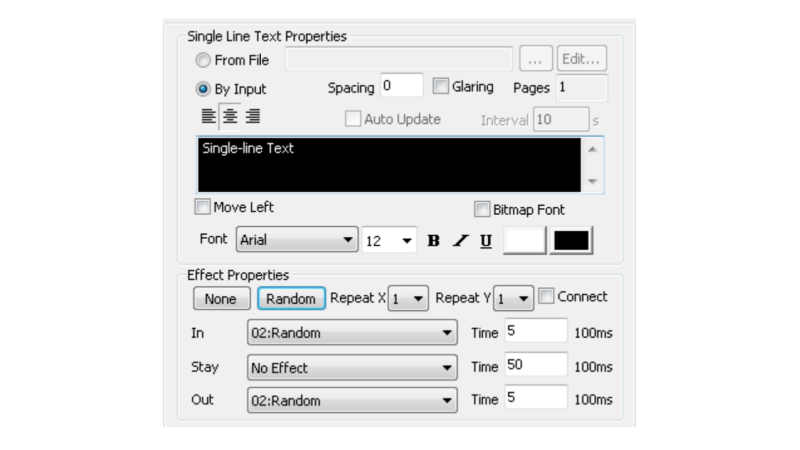
B. Text & Subtitles Add a Single-Line Text Window for scrolling notifications.
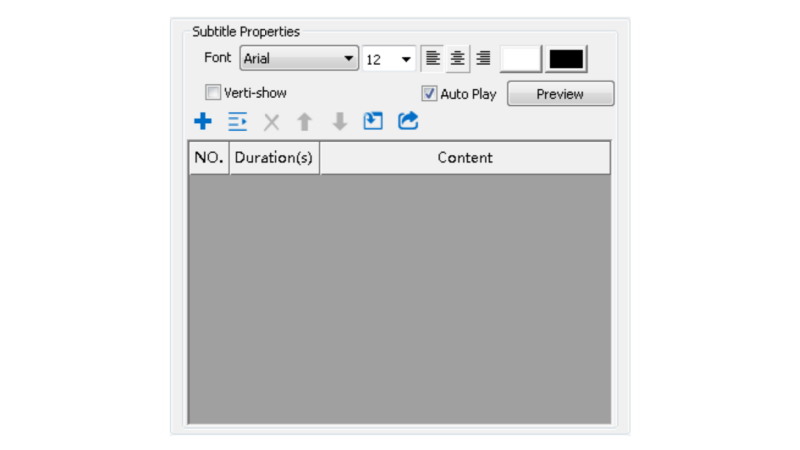
Use Subtitle Window to overlay captions on videos: Import .txt or .lrc files and adjust font/position.
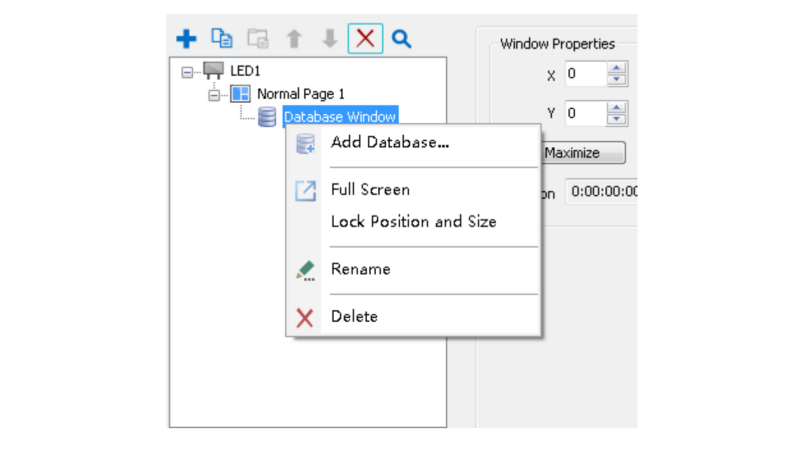
C. Live Data Database Integration: Add a Database Window > Select Oracle, SQL, or Excel files. Set refresh intervals to display real-time stats (e.g., sales numbers).
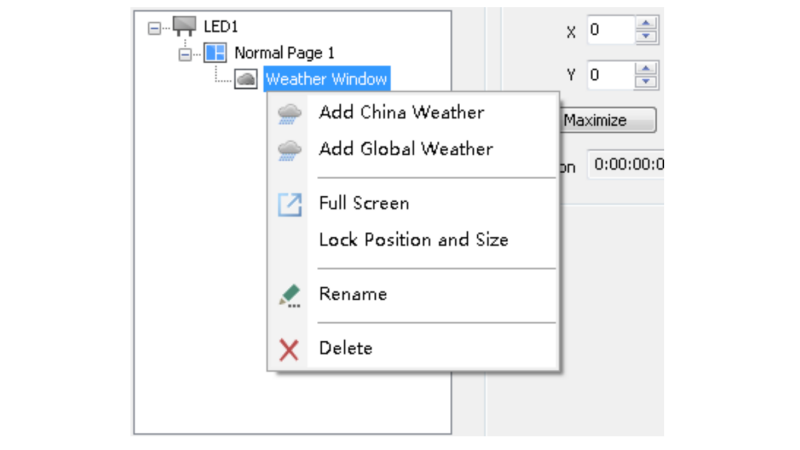
Weather Feeds: Add a Weather Window > Enter a city name for live forecasts.
Step 4: Schedule Automated Playback
Automate tasks like turning screens on/off or switching playlists.
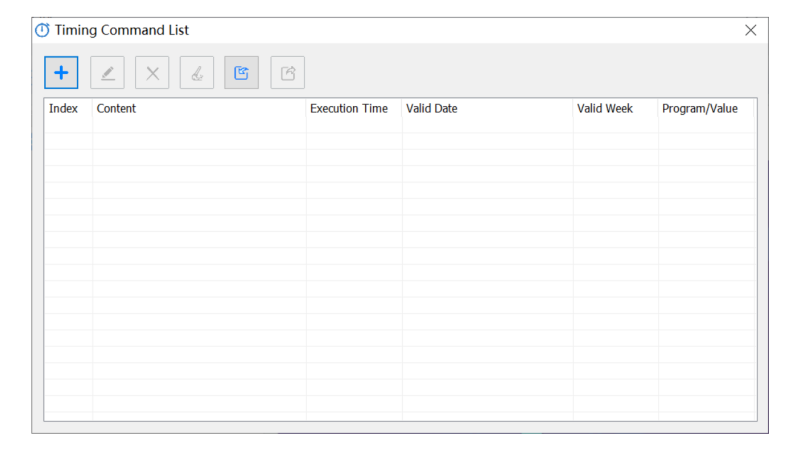
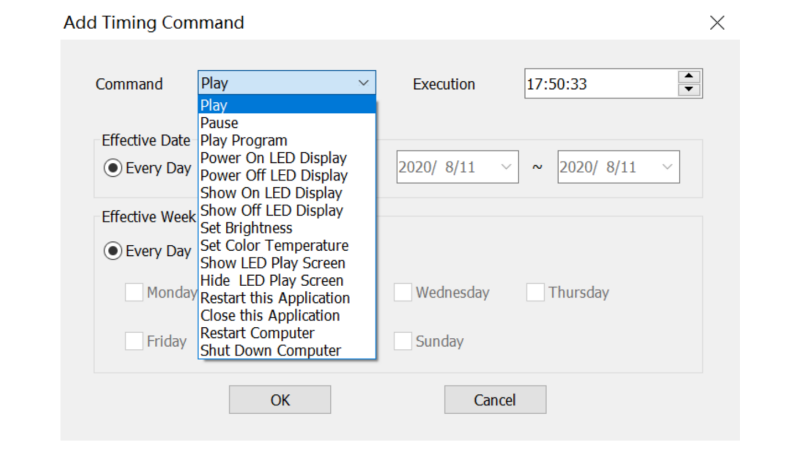
Go to Control > Timing Command List.
Click Add and set: Action: “Turn on screen,” “Play Program 1,” or “Adjust brightness.”
Time: Specify exact execution times (e.g., 8:00 AM daily). Save the schedule—no manual intervention needed!
Step 5: Troubleshoot Common Issues
Problem: Video/Office files won’t play. Fix: Install Microsoft Office (WPS isn’t supported) and update video codecs.
Problem: Icons are grayed out. Fix: Go to Settings > Play Mode > Normal Play Mode.
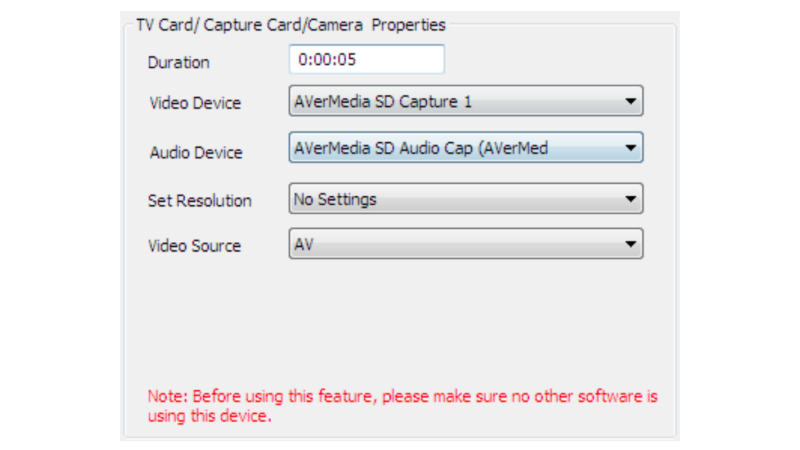
Problem: External video feed is distorted. Fix: In Video Capture Window > Set Resolution, match the source device’s output.
Step 6: Advanced Tips for Professionals
Multi-Layer Effects: Use Opacity settings to blend videos with text or logos.
Real-Time Adjustments: During playback, right-click the preview screen to switch pages or freeze content.
Offline Playback: Send content to receiver cards via Control > Offline Play for standalone operation.
4. Conclusion
LEDVISION is a powerful and flexible software platform for anyone managing LED displays. It combines ease of use with deep control features, making it suitable for both first-time users and experienced engineers.
To get started, pick the version that fits your hardware, download from LedInCloud, and follow the basic setup steps. With LEDVISION, managing your LED screen becomes a smoother, more efficient process.