
NovaStar NovaPro UHD Jr Review: Specs, Setup and Price
The NovaPro UHD Jr handles a job that usually takes two separate boxes — a processor and a sending card — and does it in one. NovaStar built this thing so you’re not stuck wiring different units together and hoping the software plays nice between them.
This guide covers what it does, what’s inside it, roughly what it costs, and how to get it running. Already bought one? The manual and firmware links are further down too.
1. What Is the NovaPro UHD Jr?
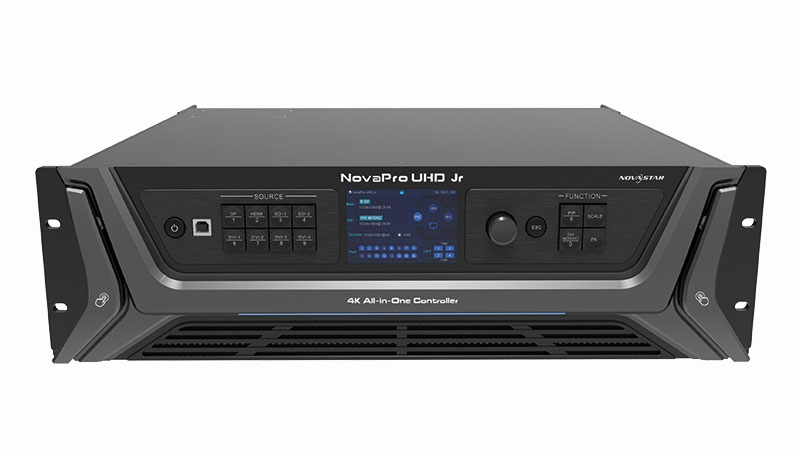
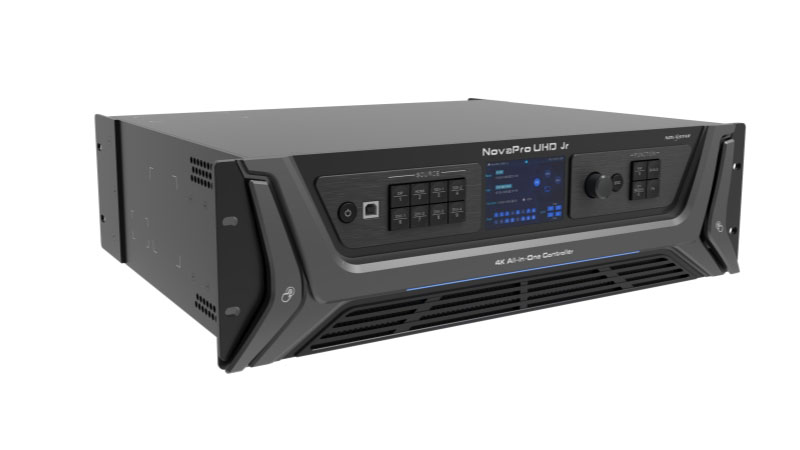
The NovaPro UHD Jr is an all-in-one LED display controller from NovaStar Technology. It combines video processing and sending card functions in one 3U chassis, so a single unit handles work that usually needs two separate boxes.
At its core, video comes in, the NovaPro UHD Jr processes it, and the output goes to your LED screen over Ethernet or fiber.
2. Key Features
There’s a lot going on under the hood here, so let’s break down what you’ll actually notice day to day.

✔ HDR Output
HDR10 support means richer contrast and color range on compatible source footage. One catch: turning it on halves your output capacity.
✔ 3D Mode
Works with NovaStar’s shutter glasses system for stereoscopic content. Same tradeoff as HDR — output capacity gets cut in half while it’s running.
✔ DVI Mosaic and Multi-Format Inputs
Combine up to four DVI inputs into one larger source. Beyond DVI, it also takes HDMI 2.0, DP 1.2, and 12G-SDI, so you’re not locked into one signal type.
✔ Low-Latency Output
Paired with NovaStar’s Armor series receiving cards, delay from sending card to receiving card drops to two frames. Built for live events where sync matters.
✔ Free Topology
Skips the usual pixel-calculation headache around odd cabinet shapes, so Ethernet ports get used more efficiently. Requires compatible receiving cards.
✔ Hot Backup and Signal Redundancy
If your primary signal drops, a backup source takes over automatically. An Ethernet port backup test lets you confirm backups work without unplugging anything.
✔ Layered Display with OSD
Runs a main layer plus two PIP layers, with a dedicated OSD layer for overlays and logos on top. Backgrounds can be a solid color or a captured image.
✔ Image Mosaic Across Multiple Units
Link up to four units together for a larger screen. V-Can software treats them as one canvas instead of separate outputs.
✔ Presets and EDID Management
Save up to 10 full configurations and reload them instantly. Supports both standard and custom EDID to avoid handshake issues between devices.
3. NovaStar UHD Jr Specifications
Here’s what matters when you’re sizing this up against other controllers.
3.1 Inputs
| Connector | Qty | Max Resolution |
| DVI | 4 | 3840×1080@60Hz (dual-link) |
| 12G-SDI | 2 | 4096×2160@60Hz |
| DP 1.2 | 1 | 3840×2160@60Hz |
| HDMI 2.0 | 1 | 3840×2160@60Hz |

3.2 Outputs
| Connector | Qty | Capacity |
| Ethernet | 16 | Up to 10.4 million pixels total |
| Optical fiber (OPT) | 4 | Doubles as Hot Backup or Copy |
| Monitor (HDMI) | 1 | Up to 1920×1080@60Hz |

3.3 Physical Specs
| Spec | Value |
| Dimensions | 482.6 × 395.5 × 139.0 mm (3U) |
| Net weight | 6.3 kg |
| Power | 100–240V~, 70W max |
| Operating temp | 0°C to 45°C |
4. Core Functions
These are the concepts you’ll actually be working with once the box is running.
(1) Two Working Modes
The NovaPro UHD Jr switches between Video Controller mode and Fiber Converter mode. In Video Controller mode, both the Ethernet and fiber ports output to your screen. Flip to Fiber Converter mode, and the fiber ports become inputs instead — useful when this unit sits downstream of another controller and just needs to convert fiber signal to Ethernet.


(2) Multi-Unit Image Mosaic
One unit tops out at 10.4 million pixels. Need more? Link up to four NovaPro UHD Jr units together, and they act as one combined canvas instead of four separate outputs. Each unit handles its own slice of the total image, split by pixel coordinates rather than by screen count.
(3) Layers, Background, and OSD
The display runs on three stacked layers: one main layer and two PIP layers, each pulling from a different input source if you want. Behind all of that sits a background layer — either a solid color or a captured image. On top sits the OSD, reserved for overlays like logos or tickers that always stay visible no matter what’s happening underneath.
5. Setup Guide
Here’s how these features actually get configured on the device.
5.1 Quick Screen Configuration
Step 1: Go to Screen Settings > Quick Configuration.
Step 2: Enter your cabinet row and column count.
Step 3: Set how many cabinets Ethernet port 1 loads.
Step 4: Pick the data flow direction matching your physical wiring.
Step 5: Check the screen — it updates live as you adjust each value.

5.2 Layer and Preset Setup
Step 1: Open Layer Settings and select Main, PIP1, or PIP2.
Step 2: Assign an input source and, if needed, a backup source.
Step 3: Turn on Primary Source Preferred if you want the layer to switch back automatically once the main signal returns.
Step 4: Once the layout looks right, save it as a preset (up to 10 available).
Step 5: Reload any saved preset later using the number buttons on the front panel.

5.3 Multi-Unit Image Mosaic Setup
For four units covering a 7680×4320 screen, assign each device its own section:
| Unit | Load Width | Load Height | Initial X | Initial Y |
| 1 | 3840 | 2160 | 3840 | 0 |
| 2 | 3840 | 2160 | 0 | 0 |
| 3 | 3840 | 2160 | 0 | 2160 |
| 4 | 3840 | 2160 | 3840 | 2160 |
Initial X/Y marks where each unit’s slice sits inside the full image — get these wrong and sections overlap or leave gaps.

5.4 Hot Backup and OPT Mode Setup
(1) Ethernet port hot backup (device-level):
Step 1: On the primary unit, set Hot Backup to “Set as Primary.”
Step 2: On the backup unit, set it to “Set as Backup.”
Step 3: If the primary fails, the backup takes over automatically.
(2) OPT Mode (fiber port-level):
Step 1: Go to Advanced Functions > OPT Mode.
Step 2: Choose Hot Backup so OPT 3/4 silently back up OPT 1/2.
Step 3: Or choose Copy if you just want OPT 3/4 mirroring the same output.


5.5 3D Mode Setup
Step 1: Connect your 3D source to DVI, HDMI, or DP.
Step 2: Route the signal through NovaStar’s EMT200 3D emitter alongside your screen.
Step 3: Turn on 3D Mode and select the source format: Side-by-Side, Top-and-Bottom, or Frame Sequential.
Step 4: Set the right eye start value:
- Side-by-Side: half the video’s width
- Top-and-Bottom: half the video’s height
- Frame Sequential: no adjustment needed
Step 5: Adjust eye priority (left or right) and signal delay time based on how the image looks through your glasses — there’s no fixed number here, since it depends on your glasses and signal timing.
For multi-unit 3D, match every setting across all devices — format, eye priority, right eye start, delay time — and turn on synchronization with the 3D source as the sync signal.

6. NovaPro UHD Jr Price
A single unit runs around $5,800 USD, based on current pricing through NovaStar’s authorized channels. That figure doesn’t include packing or shipping costs, and it can shift depending on order quantity, your region, and which accessories or receiving cards you’re bundling with it.
Since pricing changes with configuration, the most reliable way to get an exact number is through our LED Screen Cloud Platform. Pick NovaStar under Video Processor, select NovaPro UHD Jr, and you’ll get a live quote instantly — no waiting on email back-and-forth. If you’d rather talk through your specific project first, our team can also put together a custom quote directly.
7. NovaPro UHD Jr vs NovaPro UHD
Both carry the “UHD” name, but they’re built for different jobs. Here’s how they stack up.
| Features | NovaPro UHD Jr | NovaPro UHD |
| Control method | Front panel knob and menu system | Mouse, keyboard, and monitor via Master VI software |
| Layers | 3 (main + 2 PIP) | 6 (up to 2× 4K×2K and 4× 2K×1K) |
| Max loading capacity | 10.4 million pixels | 10.4 million pixels |
| Power consumption | 70W | 180W |
| Power supply | Single | Dual redundant |
| Net weight | 6.3 kg | 21 kg |
| Multiviewer/monitoring | Not built in | Dedicated MVR and AUX ports |
| Genlock for XR | Not specified | Yes |


Loading capacity is identical on paper, so the real gap is control style and redundancy. The Jr runs off its front panel and suits rack-and-go jobs like stage rentals. The full UHD needs a GUI setup but adds dual power supplies, six layers, and genlock — built for fixed installs and XR stages where uptime matters more than portability.
8. NovaPro UHD Jr Manual, Software & Firmware Download
Whether you’re comparing specs before buying or already running one on-site, here’s where the official files live.
The user manual covers full menu operations — screen configuration, layer and preset setup, 3D mode, OPT backup, and troubleshooting. It’s currently at version V1.5.2. The specifications sheet (V1.5.1) has the hard numbers: port layout, input/output resolutions, and physical dimensions — useful if you just need to confirm compatibility without reading the whole manual.
For control software, NovaStar’s V-Can platform handles screen configuration and layer management from a PC, and it’s what most of the setup steps in this guide run through. Firmware updates get pushed periodically to fix bugs or add features like the free topology support that landed in a recent release.
All of NovaStar products’ manuals, specs sheet, V-Can, and firmware are available through LedInCloud NovaStar software download page.
9. FAQ
Can I control the NovaPro UHD Jr without a computer?
Yes. Everything runs from the front panel — knob, buttons, and the built-in screen. A laptop is only needed if you're using V-Can for more advanced multi-unit setups.
When should I use the fiber (OPT) output instead of Ethernet?
Fiber output is designed for longer transmission distances and large or distributed installations. It provides lower signal loss compared with copper Ethernet over long runs. For a typical single-screen setup within normal cable distance, Ethernet works well without additional fiber equipment.
Does the NovaPro UHD Jr accept interlaced video signals?
Only through 12G-SDI. The DVI, DP, and HDMI inputs do not support interlaced signals, so SDI is required when using an interlaced video source.
Is switching to a backup source instant, or does the screen glitch?
The NovaPro UHD Jr supports automatic backup switching when the primary signal fails. When the main source returns, the system switches back seamlessly without manual operation.
Can each layer run a different resolution at the same time?
Yes. The Main, PIP1, and PIP2 layers can use independent sources with different resolutions, scaling modes, and positions. Each layer can be configured separately based on the content requirements.
Which receiving cards work best with the NovaPro UHD Jr?
For HDR applications, use NovaStar A8s or A10s receiving cards. For 2-frame low-latency performance, compatible Armor series cards such as A8, A8s, A9s, and A10s are recommended.
10. Conclusion
The NovaPro UHD Jr earns its spot in a rack by doing two jobs at once — processing and sending — without forcing you to babysit two separate boxes. It’s not the biggest controller NovaStar makes, but for stage rentals, conference rooms, and mid-size fixed installs, that’s rarely the point. Reliable backups, decent layer flexibility, and straightforward front-panel control matter more day to day than raw headroom you’ll never touch.
If you’re still weighing this against the full NovaPro UHD, go back to what your job actually needs — portability and simple control, or six layers and dual power redundancy. Either way, Contact LedInCloud can help you land on the right configuration and get you an exact quote.