NovaStar MCTRL300 Specs, Setup and Software — Everything You Need
The NovaStar MCTRL300 is a synchronous LED display controller designed for small to medium LED screen projects. It works as a standalone box — no PC card installation needed. For rental stages, indoor fixed installations, and event displays, it’s one of the most widely used controllers in the NovaStar lineup.
This guide covers the full specs, how it works, setup steps, pricing, and software download for the MCTRL300.
1. What Is the NovaStar MCTRL300?
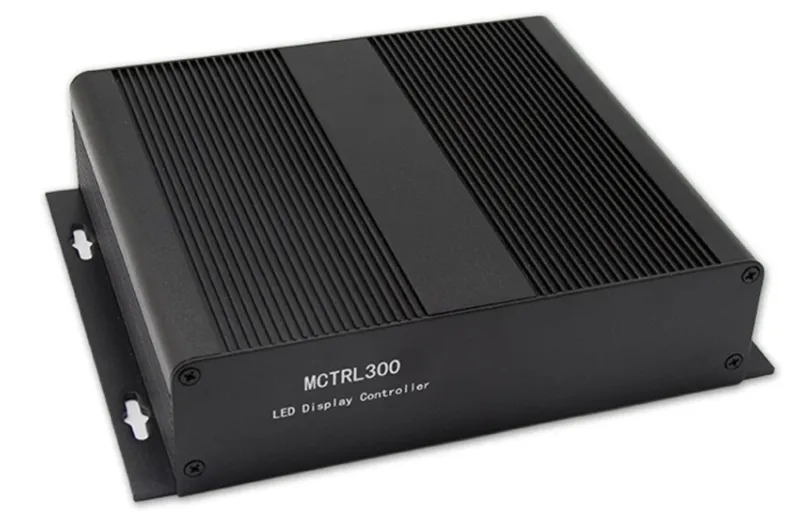
The MCTRL300 is a standalone LED display controller from NovaStar’s M3 series. Unlike a sending card that installs inside a PC, it’s an external box that sits between your computer and the LED screen.
Inside the unit, there’s a built-in MSD300 sending card. That’s what handles the encoding and transmission of the video signal. So when you see it referred to as a “sending box,” that’s essentially what it is — the sending card is already integrated.
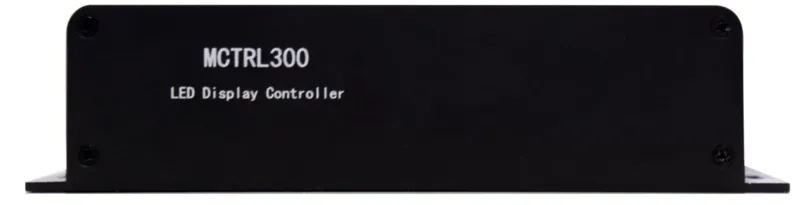
It connects to your PC via a USB Type-B port for configuration, and outputs video to the LED cabinets through two Gigabit Ethernet ports. A single unit supports up to 1.3 million pixels, and up to 20 units can be cascaded via UART ports.
It’s mainly used in rental LED screens, indoor fixed installations, live events, retail signage, and sports venues.
2. MCTRL300 Specs
The MCTRL300 is a compact controller — it weighs just 1.04 kg and measures 204 × 160 × 48 mm. But don’t let the size fool you. It handles up to 1.3 million pixels across two Gigabit Ethernet outputs, which is enough for most small to medium LED display projects.
Here’s a quick look at the key specs:
| Parameter | Details |
| Video Input | 1× SL-DVI, up to 1920×1200@60Hz |
| Audio Input | 1× Audio |
| Video Output | 2× Gigabit Ethernet, 650,000 pixels per port |
| Total Pixel Capacity | 1.3 million pixels |
| Control | 1× USB Type-B |
| Cascading | Up to 20 units via UART |
| Power | AC 100V–240V, 3.0W |
| Operating Temp | –20°C to +60°C |
| Certifications | CE, FCC, RoHS, EAC, IC, CB |

3. MCTRL300 Key Features
The MCTRL300 keeps things simple, and that’s actually one of its strengths. It doesn’t try to do everything — but what it does, it does reliably.

✔ Dual Ethernet output with port redundancy
Each port handles up to 650,000 pixels. If one connection drops mid-show, the other takes over automatically. For rental and live event setups, that’s a real safety net — your display keeps running without interruption.
✔ Pixel-level brightness and chroma calibration
Working with NovaLCT and NovaCLB, the MCTRL300 calibrates brightness and color at the pixel level. Over time, LED panels develop inconsistencies — some pixels get brighter, others shift in color. This brings everything back into alignment. For fixed installations in retail stores, conference rooms, or sports venues, that consistency is hard to ignore.
✔ Auto brightness adjustment
There’s a light sensor connector on the rear panel. Hook up a sensor, and the screen adjusts brightness automatically based on ambient light. Bright room during the day, darker in the evening — no manual tuning needed.
✔ Cascade up to 20 units
If your project grows, you don’t need to replace the whole system. Up to 20 MCTRL300 units can be chained via UART ports and controlled together. It’s a straightforward way to scale when the display gets bigger.

4. NovaStar MCTRL300 Price
The MCTRL300 is one of the more affordable controllers in the NovaStar lineup. The price typically sits around $155, but it can vary depending on the supplier, order quantity, and shipping costs.
If you’re sourcing the MCTRL300 for a project — especially in bulk — it’s worth getting a direct quote. Register on LedInCloud – LED Screen Cloud Platform to access real-time pricing and compare options without going through multiple suppliers.
5. How the MCTRL300 Works?
The MCTRL300 works as a sending box. It sits between your computer and the LED screen, taking the video signal from your PC, processing it, and pushing it out to the display through Ethernet.
Here’s how the signal flows. Your computer outputs a DVI signal to the MCTRL300. The controller processes it, then sends it through two Gigabit Ethernet ports to the receiving cards inside the LED cabinets. Those receiving cards drive the LED modules to show the image on screen.
Your PC also connects to the MCTRL300 via USB Type-B — but that connection is purely for configuration. You use it with NovaLCT software to set up the display, adjust output resolution, and run calibration. So there are two separate connections from your PC to this LED display controller: one DVI cable for video, one USB cable for control.

The RUN indicator light
The front panel RUN light tells you what the controller is doing at a glance:
- Slow flashing (once every 2s) — no video input detected
- Normal flashing (4 times per second) — video input active and running
- Fast flashing (30 times per second) — displaying the startup image
- Breathing effect — Ethernet port redundancy has kicked in
If something looks off with your display, the RUN light is the first thing to check.
6. What Is the MCTRL300 Used For?
The MCTRL300 works well for both rental projects and fixed installations. It’s not a high-end processor, but for small to medium LED displays, it covers most real-world use cases.

6.1 Rental and live events
Stage backdrops, concert screens, corporate event displays — the MCTRL300 is a common choice for all of these. It’s compact, easy to transport, and stable during live shows. The port redundancy helps too. If one Ethernet connection drops mid-show, the other takes over. No interruption to the display.
6.2 Fixed indoor installations
For permanent setups like retail signage, lobby displays, or conference room screens, the MCTRL300 runs reliably over long periods. The pixel-level calibration also keeps color and brightness consistent over time.
6.3 Security monitoring centers
The MCTRL300 operates in temperatures from –20°C to +60°C. So it handles control rooms and monitoring centers where displays run around the clock without issues.
6.4 Sports venues
Scoreboards, perimeter screens, indoor sports displays — these all need a controller that stays stable for extended run times. The MCTRL300 handles that well.
To understand the differences between MCTRL300 and other synchronous controllers, a detailed comparison table is available here.
| NovaStar LED Display Controller | Input | Output | Control | Power |
| NovaStar MCTRL 4K | • 1x DP 1.2 | • 16x Neutrik (NE8FBH) Gigabit Ethernet ports | • ETHERNET | AC 100 V~240 V-50/60 Hz |
| NovaStar MCTRL R5 | • 1x 6G-SDI • 1x HDMI 1.4 • 1x DL-DVI | • 8x RJ45 Gigabit Ethernet ports • 2× 10G optical ports | • ETHERNET • IN: 1x type-B 2.0 • OUT: 1x type-A USB 2.0 • GENLOCK IN-LOOP | AC 100V~240V-50/60Hz |
| NovaStar MCTRL660 PRO | • 1x SL-DVI input • 1x HDMI 1.4a input • 3G-SDI IN | • 6x RJ45 Gigabit Ethernet ports • 2x 10G optical ports • DVI LOOP • HDMI LOOP • 3G-SDI LOOP | • ETHERNET • IN: 1x type-B USB 2.0 • OUT: 1x type-A USB 2.0 • GENLOCK IN-LOOP | 100 V–240 V AC |
| NovaStar MCTRL660 | • 1x SL-DVI input • 1x HDMI 1.3 input • AUDIO | • 4x RJ45 Gigabit Ethernet ports • 1x HDMI 1.3 output • 1x SL-DVI output | • Type-B USB 2.0 port • UART IN/OUT | AC 100V-240V~50/60Hz |
| NovaStar MCTRL600 | • 1x SL-DVI input • 1x HDMI 1.3 input • AUDIO | • 4x RJ45 Gigabit Ethernet ports | • Type-B USB 2.0 port • UART IN/OUT | AC 100-240V~50/60Hz |
| NovaStar MCTRL500 | • DVI IN • AUDIO | • 2x OUT 1–4 • DVI OUT | • RS232 IN • RS232 OUT | AC 100V~240V-50/60Hz |
| NovaStar MCTRL300 | • 1x SL-DVI input • AUDIO | • 2x RJ45 Gigabit Ethernet ports | • Type-B USB 2.0 port • UART IN/OUT | AC 100V-240V~50/60Hz |
| NovaStar MCTRL700 | • 1x SL-DVI input connector • 1x HDMI 1.3 input • AUDIO | • 6x RJ45 Gigabit Ethernet ports • HDMI OUT • DVI OUT | • Type-B USB 2.0 port • UART IN/OUT | AC 100V-240V~50/60Hz |
8. NovaStar MCTRL300 Software & User Manual Download
Here are the official downloads for the MCTRL300. All files are from NovaStar.
Resource | Description |
Official spec sheet in PDF format | |
Latest firmware for the MCTRL300 |
If you need NovaLCT, NovaCLB, or other NovaStar software, head over to our NovaStar Software Download page. All major NovaStar software versions are listed there, with direct download links.
8.1 Software Connection
(1) Wired Connection: If the hardware connection and the sending card work normally, NovaLCT will be connected to the sending card automatically. Then, the sending card quantity and control system monitoring information will show on this software.

You need to Log in to do more operations. After your successful login, you will see the window below:

(2) No Sending Card Connection: NovaLCT can send video to a receiving card directly without the need for a sending card. This mode could be used when the receiving cards on your LED Screen are designed to operate without a sending card.

The “no sending card mode” enhances the simplicity and user-friendliness of LED display systems by streamlining the hardware setup and potentially lowering system costs and complexity. However, it’s important to note that only a few receiving cards support this mode, and these specialized cards may come at a higher price compared to standard ones. Given that an LED screen typically comprises multiple cabinets, each requiring its own receiving card, the overall cost implications should be carefully considered.
8.2 User Guides
NovaLCT provides a variety of functions. Here we are going to give some guides about key features.
8.2.1 Brightness and Chroma Calibration
(1) Set Online Calibration Parameters
Step 1: Click User > Advanced Synchronous System User Login. Enter the password and click OK. NovaLCT-MARS’s default password is “admin”.
Step 2: Click Tools > Calibration from the menu.

Step 3: Choose the Single-Screen Mode or Combined-Screen Mode tab.
Step 4: If you choose the single-screen mode, please select a communication port and screen. In combined-screen mode, skip this step.
Step 5: Set the displayed parameters.
- Choose the Position to Display Image: Choose to display the image of the primary or extended monitor on the screen.
- Device Response Time: It’s to make the display window and camera fit well in the combined-screen mode.
- Method to Display Image: Hardware test pattern or signal test pattern.
- Enable/Disable Calibration: You can select disable calibration, brightness calibration, chroma calibration, or full-grayscale calibration. Dark or bright line correction and low-grayscale calibration can also be chosen at the same time. Click Save to apply your settings.
Step 6: If network monitoring succeeds, open NovaCLB and enter the local IP address and port number displayed on the Online Calibration tab page of NovaLCT to connect NovaCLB to NovaLCT.
If network monitoring fails, click Reconnect, or change the port and then click Reconnect.
(2) Get Average Coefficients
Choose the Single-Screen Mode tab and select a communication port and screen. Click the Offline Calibration tab

Choose an area to get the average calibration coefficients. Then, click Get Average Coefficients. When you get the average calibration coefficients, click OK.
(3) Manage Calibration Coefficients
Select the Single-Screen Mode and the Manage Coefficients tab. Then, do the following operations as you want.
- Upload coefficients
- Save calibration coefficients to the database
- Set coefficients for a new receiving card
- Set coefficients for a new module
- Adjust coefficients (Color is not uniform on screen)
- Erase or reload calibration coefficients
- Reset calibration coefficients
- Upload coefficients (for factory use)
- Module Flash
- Upload thermal compensation coefficients
- Adjust the values of red, green, and blue
- Adjust the brightness, saturation, and hue for red, green, and blue, and adjust the color temperature
(4) Manage Double Calibration Coefficients
Choose a mode: Single-Screen Mode or Combined-Screen Mode (A communication port and a screen should be chosen in Single-Screen Mode)
8.2.2 Adjust Brightness
(1) Adjust Brightness Manually
- Choose Settings > Brightness from the menu bar
- Choose Select Manual Adjustment. Then, drag the slider to adjust brightness and select Grayscale or Contrast. You can also set Gamma Interlink if the screen is using receiving cards with TBS6332 or TBS6336 chips.
- There are also some other operations you can do like adjusting Gamma, color temperature, and color space.
- Click Save to HW when your adjusting is done.

(2) Adjust Brightness Automatically
- Click Settings > Brightness > Auto Adjustment > Wizard Settings
- Choose an adjustment mode as required and click Next: Light sensor adjustment or Advanced adjustment
- Click Save when the setting is done
9. FAQs
What software does the MCTRL300 use?
The MCTRL300 uses NovaLCT as its primary configuration software. Connect the controller to a PC via USB, then use NovaLCT to configure the display, adjust output settings, and manage screen parameters. For pixel-level brightness and chroma calibration, NovaCLB is also required.
What is the difference between the MCTRL300 and the MSD300?
The MSD300 is a sending card designed to be installed inside a computer. The MCTRL300 is a standalone controller that includes an MSD300 internally. In practical terms, the MCTRL300 provides the same sending functionality without requiring installation in a PC.
Can the MCTRL300 be cascaded?
Yes. Up to 20 MCTRL300 controllers can be cascaded through the UART ports, allowing synchronized control across larger LED display systems.
What is the MCTRL300 pixel capacity?
Each Ethernet output port supports up to 650,000 pixels. With two Ethernet ports available, the total loading capacity is 1.3 million pixels.
Does the MCTRL300 support HDMI input?
No. The MCTRL300 supports only single-link DVI input. If your video source provides HDMI output, you will need an HDMI-to-DVI adapter or converter before connecting it to the controller.
Can I use MCTRL300 and MCTRL660 on the same screen?
No. NovaStar does not recommend mixing different controller models within the same LED display project. Using a single controller model throughout the system helps avoid configuration and compatibility issues.
10. Conclusion
The NovaStar MCTRL300 is a reliable entry-level controller for small to medium LED display projects. It’s straightforward to use, stable in the field, and priced reasonably for what it offers.
If you’re looking to source the MCTRL300 or need help choosing the right controller for your project, feel free to contact us directly. The LedInCloud team is happy to help.