NovaStar MCTRL660 | Specs, Manual, Firmware & Price
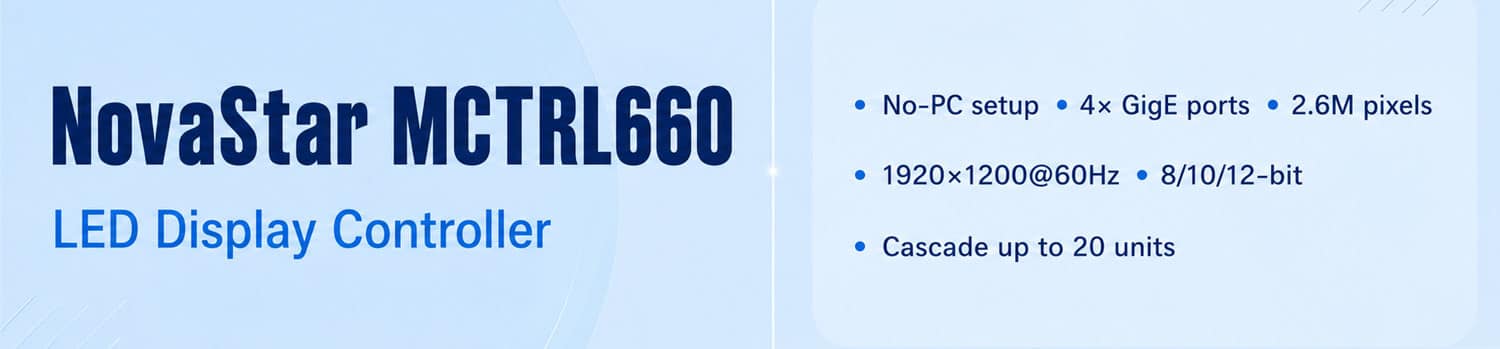
The NovaStar MCTRL660 is a standalone LED display controller. Plug it in, turn the knob, and your screen is running — no laptop required. That’s the core idea behind it, and it’s what makes it useful in fast-paced rental environments where setup time is tight.
On the signal side, it accepts up to 1920×1200@60Hz on 8-bit inputs and distributes the load across four Gigabit Ethernet ports. Each port carries up to 650,000 pixels, putting the total capacity around 2.6 million pixels. It handles both rental gigs and fixed installs — concerts, monitoring centers, sports venues, corporate lobbies.
When the front panel isn’t enough, a USB connection to NovaLCT or SmartLCT opens up the advanced stuff: bit-depth settings, gamma adjustment, cabinet file loading, firmware updates.
1. Key Features
The MCTRL660 packs a lot into a 1U rack unit. Here’s what actually matters.
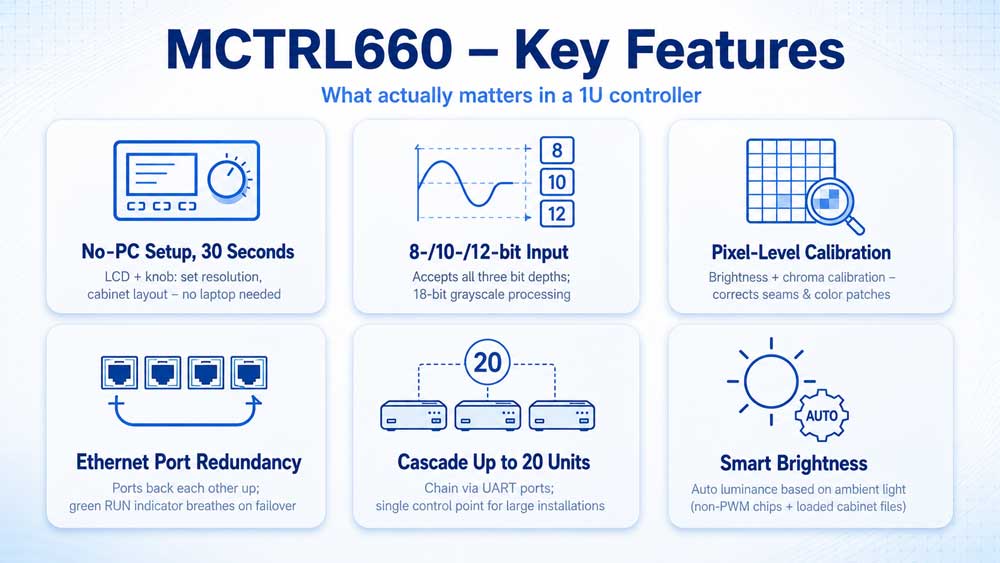
1.1 No-PC setup, 30 seconds
There’s an LCD screen and a rotary knob on the front panel. Turn to navigate, press to confirm. From those two controls alone, you can set input resolution, define your cabinet layout, and get the display running — no laptop involved. For rental crews doing back-to-back setups, this alone saves real time on-site.
1.2 8-bit, 10-bit, and 12-bit input support
The controller accepts all three bit depths, with 18-bit grayscale processing throughout. One thing to keep in mind: switching to 10-bit or 12-bit input cuts the per-port loading capacity in half. If you’re planning a high-bit-depth workflow, factor that into your pixel budget early.
1.3 Pixel-level brightness and chroma calibration
Paired with NovaStar calibration platform, the MCTRL660 corrects brightness and color at the individual LED level. Cabinet seam inconsistencies and color patches across a large display are common problems — this addresses them at the source rather than masking them through software settings.
1.4 Ethernet port redundancy
The four RJ45 output ports support redundancy between each other. If one port drops mid-show, the others take over automatically without interrupting the display. When that happens, the green RUN indicator on the front panel switches to a breathing pattern — a quick visual cue that the failover is active.
1.5 Cascade up to 20 units
When one controller isn’t enough, chain up to 20 together via the UART ports. They all operate as one system from a single control point. Useful for large fixed installations where a single unit’s pixel capacity doesn’t cover the full display.
1.6 Smart Brightness
With configuration files loaded, the controller adjusts screen luminance automatically based on ambient light. Two conditions apply: it only works with non-PWM chips, and it requires cabinet files to be loaded first. Check your cabinet spec before enabling it.
2. Technical Specifications
Below are the full specs for the NovaStar MCTRL660. These apply to the standard MCTRL660 — not the PRO variant.
| Parameter | Specification |
| Input | 1× SL-DVI, 1× HDMI 1.3 (HDCP 1.4), 1× Audio |
| Output | 4× RJ45 Gigabit Ethernet |
| Capacity per RJ45 port | 650,000 pixels (8-bit) / 325,000 pixels (10-bit, 12-bit) |
| Max input resolution | 1920×1200@60Hz (8-bit) / 1440×900@60Hz (10-bit, 12-bit) |
| Custom resolution | Up to 3,840px horizontal / 3,840px vertical |
| Cascading | Up to 20 units via UART |
| Rated power | 16W |
| Dimensions | 483.0 × 258.1 × 55.3 mm |
| Net weight | 3.6 kg |
| Certifications | FCC, CE, RoHS, IC, UL/CUL, CCC, PSE, CB, RCM |
The capacity numbers are the most important thing to understand here. Four ports at 650,000 pixels each gives you a ceiling of around 2.6 million pixels at 8-bit. But move to 10-bit or 12-bit input and each port drops to 325,000 pixels — so plan your system around the bit depth your source actually outputs, not the maximum.
Custom resolution support is also worth paying attention to. The 3,840px ceiling in both directions means you’re not boxed into standard aspect ratios. Non-standard screen shapes and ultra-wide configurations are all workable.
3. Input & Output Connections
The MCTRL660 has two sides worth understanding separately — the front panel for operation, and the rear panel for all signal connections.
3.1 Front Panel

Five elements on the front panel: a power switch, three LED indicators, an LCD screen, a rotary knob, and a BACK button.
The three indicators each tell you something different about what’s happening with the unit.
PWR (red) covers the power supply. Solid red means everything is fine. If it goes off while the unit is switched on and plugged in, start troubleshooting at the power supply — before touching anything else.
RUN (green) tracks the video signal. No input and it blinks slowly, once every two seconds. Connect a source and it speeds up to four times per second. If it shifts into a breathing pattern during a show, one of the Ethernet output ports has dropped and the redundancy has kicked in. Worth knowing before you’re standing in front of a live display wondering what changed.
STA (green) is the simplest of the three — solid means the device is operating normally. Off means it isn’t.
The LCD screen handles all the menu navigation. The rotary knob moves you through options and confirms selections. BACK steps you out of any menu without applying changes.
3.2 Rear Panel

On the output side, four RJ45 Gigabit Ethernet ports carry the signal directly to your LED cabinets via receiving cards. Next to them are HDMI OUT and DVI OUT — both are cascade outputs that feed signal forward to the next controller in the chain. They’re not monitoring loops, so don’t connect a confidence monitor there.
On the input side: DVI IN (SL-DVI), HDMI IN (HDMI 1.3 with HDCP 1.4), and an audio input. Both video inputs top out at 1920×1200@60Hz on 8-bit sources.
For control connections: the USB Type-B port labeled TO PC is what you use when connecting a laptop for NovaLCT or SmartLCT. The UART IN/OUT ports are for cascading. Power runs on AC 100V–240V, so it works on any standard supply worldwide.
3.3 Cascading Multiple Units
Run a cable from UART OUT on the first unit to UART IN on the second. Repeat across the chain. Up to 20 controllers can be linked this way and they all operate as a single system — one control point, one signal chain.
4. MCTRL660 Setup & Operation
The MCTRL660 gives you two ways to work with it. Basic screen setup runs entirely from the front panel — no PC needed. Advanced functions like cabinet file loading, bit-depth settings, and firmware updates require a laptop connected via USB. Knowing which tasks fall into which category saves a lot of confusion on-site.
4.1 Getting the Screen Running (Front Panel)
This is the standard first-time setup. Two steps, done in order.
Step 1 — Set the input resolution
The controller needs to know what resolution your source is sending before it can do anything with it.
- On the home screen, press the knob to enter the main menu
- Go to Advanced Setting → EDID Resolution
- Choose a preset resolution from the list, or scroll down to enter a custom horizontal resolution, vertical resolution, and refresh rate
- Navigate to Apply and press the knob to confirm
If you skip the Apply step, the resolution won’t change — it’s a common mistake when you’re in a hurry.

Step 2 — Set up the screen layout
- From the main menu, go to Screen Setting
- Set Cabinet Row QTY — how many rows of cabinets your display has
- Set Cabinet Col QTY — how many columns
- Set Out1 Cabinet QTY — how many cabinets Ethernet port 1 is carrying
- Set Data Flow — the direction the signal travels across the cabinet chain. Make sure all cabinets on each port are wired in the same direction, and that port 1 sits at the physical start of the chain
If the display lights up and shows the source image correctly after these two steps, you’re done with the basic setup. If the cabinets show scrambled pixels or nothing at all, the cabinet files haven’t been loaded yet — jump to the cabinet file loading section below.

4.2 Other Front Panel Operations
(1) Adjusting brightness
From the main menu, select Brightness. Rotate the knob to move the value up or down — the screen updates in real time. Press to apply when you’re happy with it.

(2) Image quality
Go to Advanced Setting → Image Quality to adjust Gamma (default 2.5), Contrast, Saturation, and Hue.
After making changes here, always select Save RV Card Parameters. This writes your settings into the receiving cards. Without it, the next power cycle wipes everything back to default.

(3) Display control
Four modes available from the main menu:
- Normal — live input source
- Black Out — screen goes dark, source keeps running in the background
- Freeze — holds the current frame, source keeps running in the background
- Test Pattern — eight built-in patterns for checking pixels and color uniformity. Run these before every deployment

(4) Factory reset
Advanced Setting → Factory Default resets all parameters back to factory settings.
4.3 PC Operations (NovaLCT / SmartLCT)
Connect a laptop to the controller using the USB Type-B TO PC port on the rear panel. NovaLCT handles most advanced functions. SmartLCT is an alternative for firmware updates.
(1) Loading cabinet files
Cabinet files (.rcfgx or .rcfg) contain the configuration for your specific cabinet model — without them, cabinets with abnormal display can’t be corrected from the front panel alone.
- Open NovaLCT on your PC
- Go to Tools → Controller Cabinet Configuration File Import
- Select the serial port the controller is on
- Click Add Configuration File and select your .rcfgx or .rcfg file
- Click Save the Change to HW
- Then run Save RV Card Parameters to push the config into the receiving cards
Configuration files for irregular cabinet shapes are not supported through this tool. Those require full screen configuration inside NovaLCT.

(2) Setting input bit depth
- In NovaLCT, go to User → Advanced Synchronous System User Login, enter password, log in
- Click Screen Configuration → choose communication port → Next
- On the Sending Card tab, find Input Source Bit Depth and select 8-bit, 10-bit, or 12-bit
- Click Save System Configuration File → Save
10-bit and 12-bit inputs both cut the per-port loading capacity in half.

(3) 10-bit gamma adjustment
- Same login as above
- Go to Brightness → Manual Adjustment → Advanced Settings → Gamma Adjustment → Gamma Value Adjustment
- Drag the slider to your target value
- Click Save to HW

(4) Firmware update via NovaLCT
- Log in as above, then type admin to open the program loading page
- Click Browse and select the firmware package
- Click Update and wait for the process to complete
(5) Firmware update via SmartLCT
- Open SmartLCT and go to the V-Sender page
- Click the firmware upgrade icon in the properties panel on the right
- Select the update file path and click Update
Don’t disconnect the controller or close the software during a firmware update.
(6) If NovaLCT can't detect the controller
Check TCP Port 6600 first. NovaLCT uses this port to communicate — a firewall blocking it is the most common reason the software shows nothing connected. Open Port 6600 and try again before troubleshooting anything else.
5. NovaStar MCTRL660 Manual & Firmware Download
Three documents cover everything you need for the MCTRL660. The user manual walks through hardware setup, front panel operation, and PC-based configuration. The spec sheet has all the technical parameters in one place — useful for system design and compatibility checks. The firmware file is for updating the controller via NovaLCT or SmartLCT.
All three are the latest versions.
NovaStar MCTRL660 User Manual — Download
NovaStar MCTRL660 Specifications — Download
NovaStar MCTRL660 Firmware — Download
For NovaLCT, SmartLCT, and other NovaStar software, visit the LedInCloud NovaStar Software download page.
✔ NovaStar MCTRL660 Maintenance Guide
Routine maintenance guide for the NovaStar MCTRL660 LED display controller.
6. MCTRL660 vs MCTRL660 PRO
If you’re deciding between the two, the short answer is this: the standard MCTRL660 covers most rental and fixed install work just fine. The PRO exists for situations where fiber output, broadcast-grade inputs, or a higher pixel ceiling are non-negotiable.
| Parameter | NovaStar MCTRL660 | NovaStar MCTRL660 PRO |
| Video inputs | SL-DVI, HDMI 1.3, Audio | SL-DVI, HDMI 1.4a, 3G-SDI |
| Ethernet outputs | 4× RJ45 Gigabit | 6× RJ45 Gigabit |
| Fiber output | None | 2× 10G optical (OPT1 / OPT2) |
| Capacity per RJ45 port | 650,000 pixels (8-bit) | 650,000 pixels (8-bit) |
| Total capacity (8-bit) | ~2.6M pixels | ~3.9M pixels |
| Max resolution (8-bit) | 1920×1200@60Hz | 1920×1200@60Hz |
| Max resolution (10/12-bit) | 1440×900@60Hz | 1920×1080@60Hz |
| 3G-SDI input | No | Yes |
| Genlock | No | Yes (Bi-Level, Tri-Level, Black Burst) |
| Image mirroring | No | Yes |
| Low latency mode | No | Yes (one-frame delay) |
| Web configuration | No | Yes |
| Dual mode | Sending card only | Sending card + fiber converter |
| Cascading | Up to 20 units (UART) | Up to 8 units (USB) |
| Rated power | 16W | 20W |
| Weight | 3.6 kg | 4.6 kg |
Who should pick which:
Go with the MCTRL660 if your display stays within 2.6 million pixels at 8-bit, you’re working rental events or standard fixed installs, and your signal source is HDMI or DVI. It’s lighter, draws less power, and the 20-unit cascading gives real flexibility for larger setups.
Go with the MCTRL660 PRO if you need fiber for long-distance signal transport, 3G-SDI for broadcast input, Genlock for frame-sync, or you’re pushing past 2.6 million pixels. Large-scale stage productions and XR studios typically land here.
7. NovaStar MCTRL660 Price
A single MCTRL660 runs around $475. That’s a single-unit baseline — the actual number shifts depending on order volume, where it’s shipping, and whether you’re buying the controller as part of a complete LED display package.
Rather than locking in a fixed price here, the more useful move is to check it directly on LedInCloud. The LED Screen Cloud Platform has a built-in Price Calculator that gives you a real-time quote in about 30 seconds. Register for free, go to Price Calculator → LED Control System → NovaStar → LED Sender, select MCTRL660, enter your quantity, and you’re done. Volume pricing, stock availability, and configuration file downloads are all in the same place.
8. FAQ
Why can't NovaLCT detect my MCTRL660?
Nine times out of ten it's TCP Port 6600. NovaLCT uses that port to communicate with the controller — if your PC firewall is blocking it, the software shows nothing connected regardless of how the cables are set up. Open Port 6600 and try again. Also confirm you're plugged into the USB Type-B TO PC port on the rear panel, not one of the RJ45 output ports. They look similar when you're working quickly.
Does the MCTRL660 support 4K input?
No. The maximum input resolution is 1920×1200@60Hz on 8-bit, and 1440×900@60Hz on 10-bit or 12-bit. If your project needs 4K input processing, the MCTRL660 isn't the right tool — look at NovaStar's VX series or the MCTRL4K instead.
Can I configure the MCTRL660 entirely without a PC?
For most things, yes. Input resolution, screen layout, brightness, image quality, display control — all of that runs from the front panel. But cabinet file loading, bit-depth settings, 10-bit gamma adjustment, and firmware updates all require a laptop connected via the USB TO PC port. If your cabinets display correctly without loading any files, you may never need a PC on-site. If they don't, you will.
My display shows scrambled pixels after setup — what do I check first?
Start with the cabinet files. Scrambled or incorrect display after a basic setup usually means the receiving cards inside the cabinets haven't been configured for that specific cabinet model. Connect a PC, open NovaLCT, and load the correct .rcfgx or .rcfg file for your cabinets via Tools → Controller Cabinet Configuration File Import. After loading, run Save RV Card Parameters. That pushes the configuration into the receiving cards and persists after power off.
Can I run 10-bit content on the MCTRL660?
Yes, the controller supports 8-bit, 10-bit, and 12-bit input sources. The trade-off is loading capacity — switching from 8-bit to 10-bit or 12-bit cuts each port's pixel capacity from 650,000 down to 325,000. Four ports at 325,000 gives you around 1.3 million pixels total. If your display is large, factor that in before committing to a 10-bit workflow.
9. Is the NovaStar MCTRL660 Right for You?
For most rental work and mid-scale fixed installations, the NovaStar MCTRL660 is a practical choice. The standalone front-panel setup saves time on-site. The 2.6 million pixel ceiling covers the majority of real-world displays. And the 20-unit cascading gives you room to grow without changing the control architecture.
If the MCTRL660 fits your spec, LedInCloud has pricing, stock status, configuration file downloads, and the full NovaStar software library in one place.