NovaStar Taurus Multimedia Player Guide
The NovaStar Taurus series is a significant leap forward in LED display technology. Whether you’re managing a dynamic advertising campaign, or operating a large-scale video wall, the Taurus series offers the perfect solution.
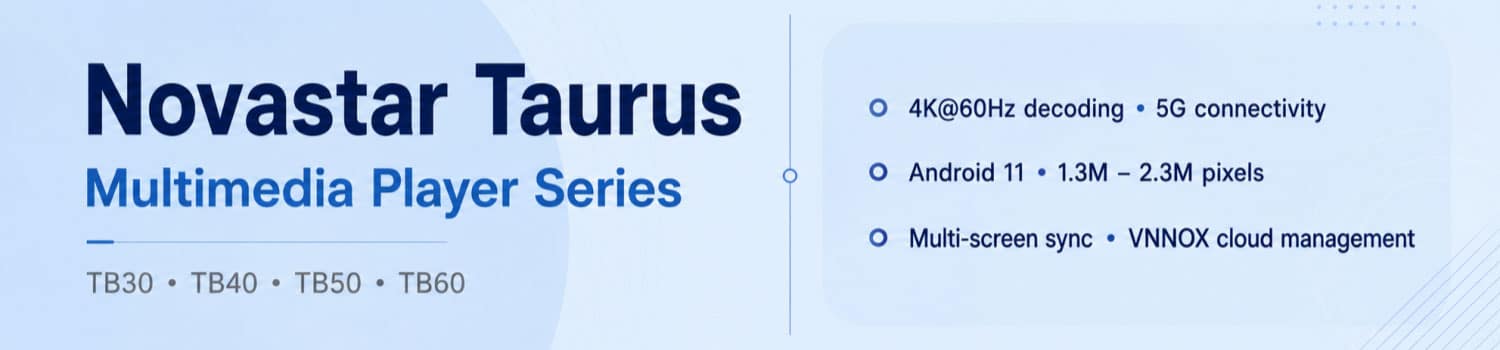
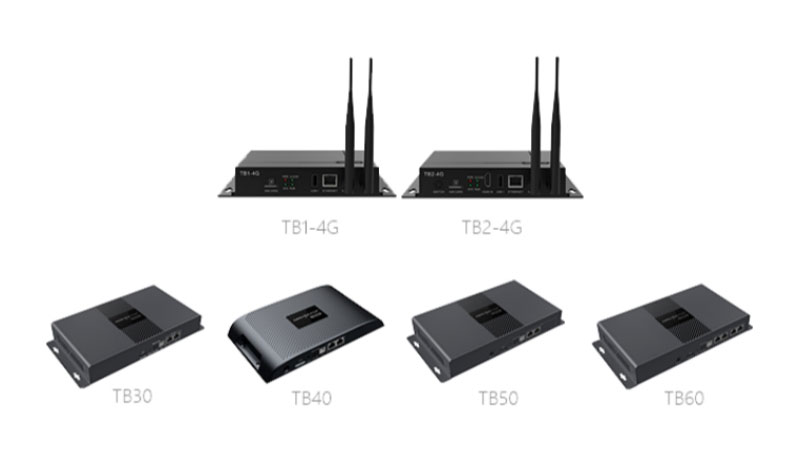
At the heart of the Taurus series is its ability to provide powerful and flexible control over medium to large LED displays. With models like the NovaStar TB1-4G, TB30, TB40, TB50, and TB60, the series covers a range of applications, from basic display management to complex, multi-screen configurations.
1. What Is the NovaStar Taurus Multimedia Player?
The Taurus series is NovaStar’s dedicated multimedia player for full-color LED screens. It is designed as an all-in-one device. It handles both media playback and the sending of content to the LED cabinets.
You can load images, videos, and other media onto the player. Then the same unit drives the display. This removes the need for a separate media player and sending card in many projects.
The player supports local control and cloud-based control. Staff can connect through a phone, tablet, or Windows computer. They can also manage multiple units from a central platform when the devices are online.
Taurus players are commonly used in fixed installations. Typical places include advertising screens, retail displays, mirror screens, chain-store screens, door-head screens, and smart city applications such as lamp-post displays.Different models in the series offer different loading capacities and features. Some support basic 1080p playback. Others handle higher pixel loads and more advanced options. The core idea stays the same across the line: one box that plays content and drives the LED screen.
2. NovaStar Taurus Multimedia Player Features
The Taurus series focuses on practical functions that matter in real LED projects.
(1) Integrated Playback and Sending
Taurus players combine two jobs in one box. They store and play media. They also send the signal to the LED cabinets.
You do not need a separate media player plus a sending card for many installations. Content goes onto the Taurus, and the same unit drives the screen. This setup cuts down on hardware and simplifies wiring.
(2) Local and Remote Management
You can control a Taurus player in several ways.
- ViPlex Handy works on Android and iOS phones. It is useful for quick local changes on site.
- ViPlex Express runs on Windows. It handles LAN-based management and batch operations.
- NovaLCT lets you log in to the player for monitoring and basic configuration.
- VNNOX is the cloud platform. Once the player is bound, you can publish content and check status from anywhere with internet access.
These tools cover both on-site work and remote daily management.
(3) Network Connectivity
Taurus players support multiple connection methods.
- You can use a direct Ethernet cable for initial setup.
- Wired LAN works when the player and computer share the same router.
- Wi-Fi AP mode lets the player create its own hotspot. The default SSID starts with “AP” followed by the last eight digits of the serial number.
- Wi-Fi Station mode joins an existing wireless network.
- Most models also accept a 4G module. Some higher models support an optional 5G module.
The player automatically picks the most stable available connection when more than one option is present.
(4) Synchronous Playback
Multiple Taurus units can play the same content at the same time. This is useful for multi-screen walls or groups of displays that need matching visuals.
The function relies on accurate time synchronization across all players. It also requires the same playback plan on every unit. Detailed setup steps appear later in this guide.
(5) Brightness and Sensor Support
Most Taurus models include a sensor interface. You can connect a light sensor for automatic brightness adjustment.
You can also set scheduled brightness changes. This helps outdoor screens adapt to day and night conditions and reduces power use.
(6) Decoding and Storage Capabilities
Higher models in the series support 4K video decoding and multiple simultaneous windows. Lower models stay at 1080p.
Internal storage is typically 1 GB RAM plus 32 GB flash. You can expand storage with a USB drive up to 128 GB.
Actual decoding performance and window counts depend on the exact model. Check the comparison table in the next section for precise figures.
3. NovaStar Taurus Player Price
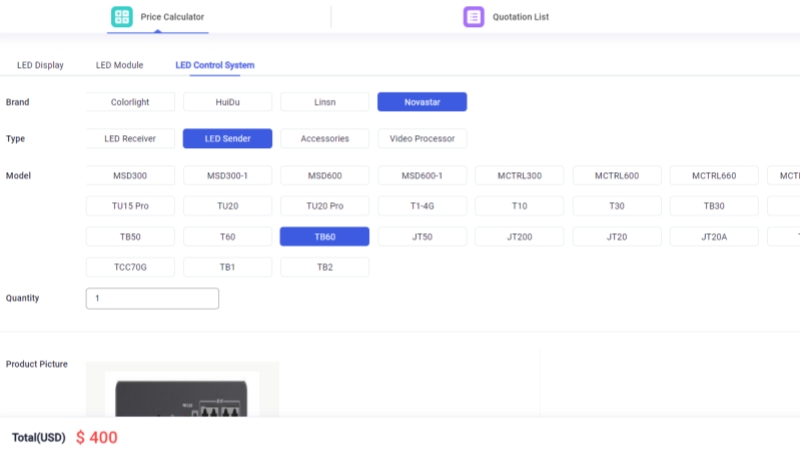
NovaStar Taurus multimedia players vary depending on factors such as model specifications, market demand, and additional features you may need. To get the most accurate and up-to-date pricing, we recommend using our LED Screen Cloud Platform.
By registering the LED Screen Cloud Platform, you’ll gain instant access to detailed pricing information for all Taurus models. This platform is designed not only to provide pricing but also to offer comprehensive insights into each model’s capabilities, helping you make an informed decision. Plus, this platform offers exclusive deals and updates, making sure you always get the best value.
4. Products Specification and Comparison
Different Taurus models suit different screen sizes and project needs. The table below shows the main differences.
| Products | NovaStar Taurus TB1-4G | NovaStar Taurus TB2-4G | NovaStar Taurus TB10 | NovaStar Taurus TB30 | NovaStar Taurus TB40 | NovaStar Taurus TB50 | NovaStar Taurus TB60 |
| Maximum Loading Capacity | 650,000 Pixels | 650,000 Pixels | 650,000 Pixels | 650,000 Pixels | 1.3 Million Pixels | 1.3 Million Pixels | 2.3 Million Pixels |
| Maximum Width and Height | Maximum Width: 1920 Pixels Maximum Height: 1080 Pixels | Maximum Width: 1920 Pixels Maximum Height: 1080 Pixels | Maximum Width: 4096 Pixels Maximum Height: 3840 Pixels | Maximum Width: 4096 Pixels Maximum Height: 4096 Pixels | Maximum Width: 4096 Pixels Maximum Height: 4096 Pixels | Maximum Width: 4096 Pixels Maximum Height: 4096 Pixels | Maximum Width: 4096 Pixels Maximum Height: 4096 Pixels |
| CPU | Main Frequency 1.2GHz | Main Frequency 1.2GHz | Main Frequency 1.3GHz | Quad-Core ARM A55 Processor @1.8 GHz | Quad-Core ARM A55 Processor @1.8 GHz | Quad-Core ARM A55 Processor @1.8 GHz | Quad-Core ARM A55 Processor @1.8 GHz |
| Storage | 1GB+32GB | 1GB+32GB | 1GB+32GB | 1GB+32GB | 1GB+32GB | 1GB+32GB | 1GB+32GB |
| Storage Expansion | U-Disk, up to 128G | U-Disk, up to 128G | U-Disk, up to 128G | U-Disk, up to 128G | U-Disk, up to 128G | U-Disk, up to 128G | U-Disk, up to 128G |
| Video Decoding | 1080P | 1080P | 4K | 4K | 4K | 4K | 4K |
| Operating System | Android5.1 | Android5.1 | Android11.0 | Android11.0 | Android11.0 | Android11.0 | Android11.0 |
| Flawless Playback | 1x1080P, 2x 720P, or 4x 360P | 1x 1080P, 2x 720P, or 4x 360P | 1x 4K, 2x 1080P, 4x 720P | 2x 4K, 6x 1080P, 10x 720P, or 20x 360P | 2x 4K, 6x 1080P, 10x 720P, or 20x 360P | 2x 4K, 6x 1080P, 10x 720P, or 20x 360P | 2x 4K, 6x 1080P, 10x 720P, or 20x 360P |
| Multi-Screen Synchronous Playback | √ | √ | √ | √ | √ | √ | |
| Synchronous and Asynchronous Switching | × | √ | × | × | √ | √ | √ |
| HDMI Splicing Playback | × | × | × | × | √ (1080P, up to 8 levels) | √ (1080P, up to 8 levels) | √ (1080P, up to 8 levels) |
| Sensor Connection | √ | √ | √ | √ | √ | √ | √ |
| Audio Output | √ | √ | √ | √ | √ | √ | √ |
| USB Local Playback | √ (USB2.0) | √ (USB2.0) | √ (USB3.0) | √ (USB3.0) | √ (USB3.0) | √ (USB3.0) | √ (USB3.0) |
| Wired Network | 100M | 100M | 100M | 1000M | 1000M | 1000M | 1000M |
| WiFi Network | 2.4GHZ,AP&STA Soft Switching | 2.4GHZ,AP&STA Soft Switching | 2.4GHZ,AP&STA Soft Switching | 2.4GHZ,AP&STA Soft Switching | 2.4GHZ,AP&STA Soft Switching | 2.4GHZ,AP&STA Soft Switching | 2.4GHZ,AP&STA Soft Switching |
| 4G Network | √ | √ | √ | √ | √ | √ | √ |
| 5G Network | × | × | × | √ | √ | √ | √ |
| Product Certifications | √ | √ | √ | √ | √ | √ | √ |
| VNNOX | √ | √ | √ | √ | √ | √ | √ |
| NovaStar SDK Protocol | √ | √ | √ | √ | √ | √ | √ |
| Bare Card Products | √ (T1-4G) | × | √ (T10) | √ (T30) | × | √ (T50) | × |
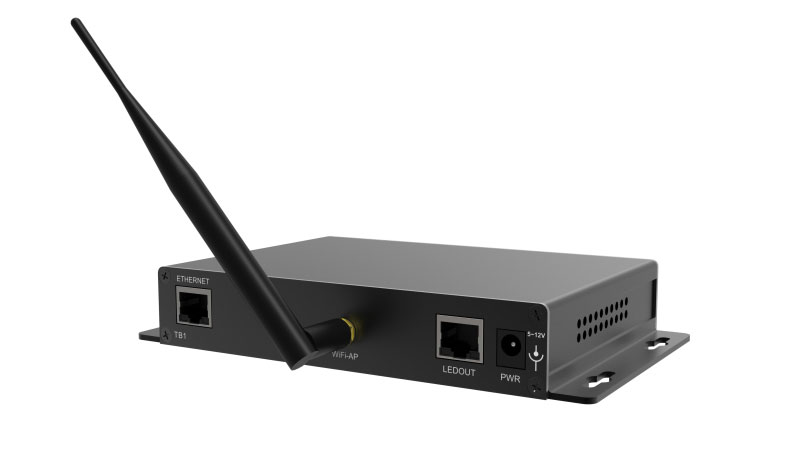
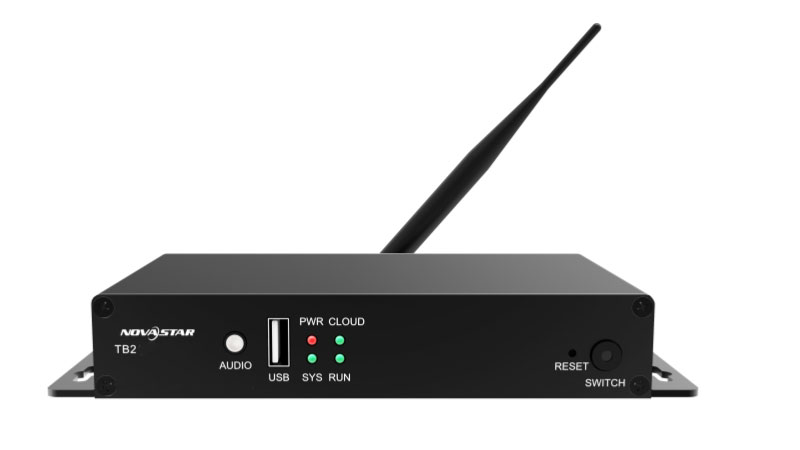
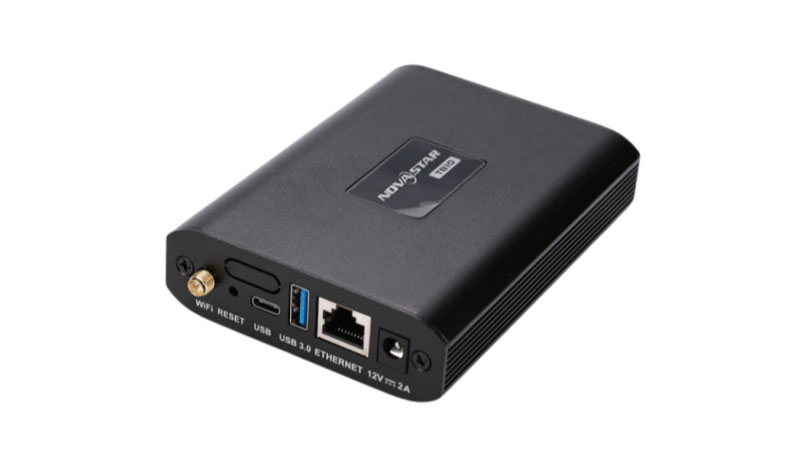
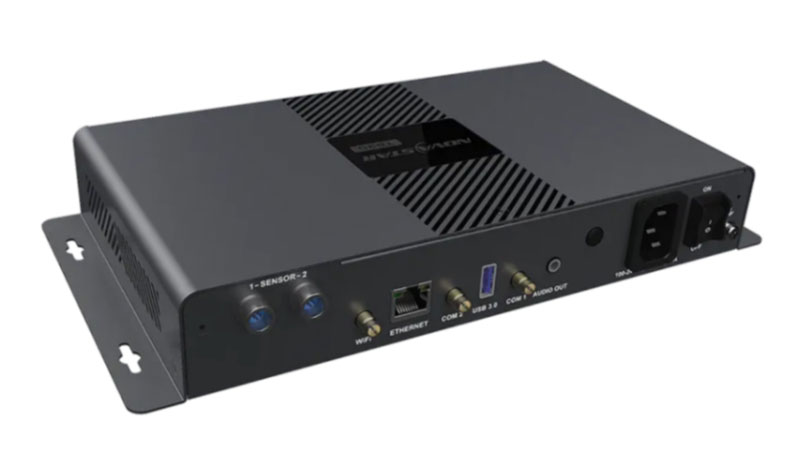
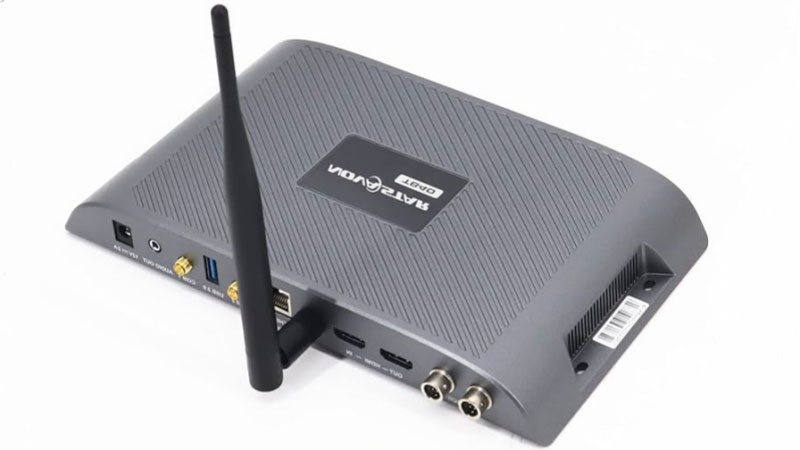
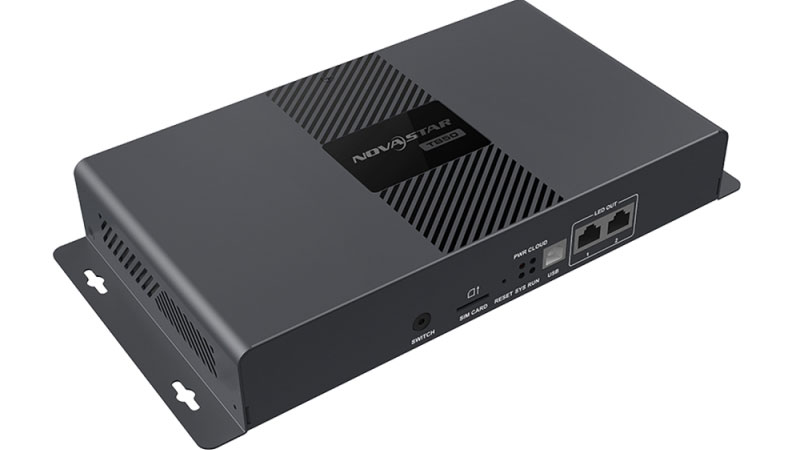
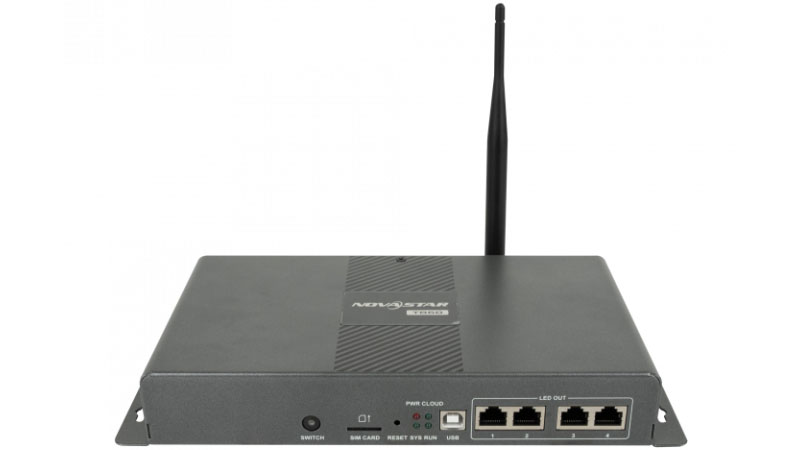
How to Choose the Right Taurus Model?
Start with the pixel load of your LED screen. This is the most important number.
If the screen stays under 650,000 pixels and you only need basic 1080p content, the TB1-4G, TB2-4G, TB10 or TB30 will work. These models keep costs lower and still support common advertising use.
When the screen goes above 650,000 pixels, move to the TB40 or TB50. Both handle 1.3 million pixels. The TB40 and TB50 also add HDMI input and output. This lets you switch between stored content and a live HDMI source.
For larger screens that need more than 1.3 million pixels, choose the TB60. It supports up to 2.3 million pixels and offers four Gigabit Ethernet ports. You can set them as all primary or as two primary plus two backup.
Also check whether you need synchronous and asynchronous switching. Only some models support the switch button on the front panel. If your project needs both stored playback and live HDMI input, pick a model that supports the dual-mode function.
Finally, look at network needs. Most models accept a 4G module. Higher models in the series also support an optional 5G module. Choose according to the installation site and how often you update content remotely.
5. Application Solutions
Taurus players fit many fixed LED installations:
5.1 AD Player and Mirror Screen Solution
AD Players and Mirror Screens commonly used for information dissemination and advertising in places like shopping malls, hotels, office buildings, exhibitions, banks, stations, and residential areas.
Mirror Screens offer a unique dual-purpose functionality. When turned off, the screen acts as a mirror, seamlessly blending into its surroundings.
There are three primary application modes for AD Players and Mirror Screens:
5.1.1 Single-Point Application
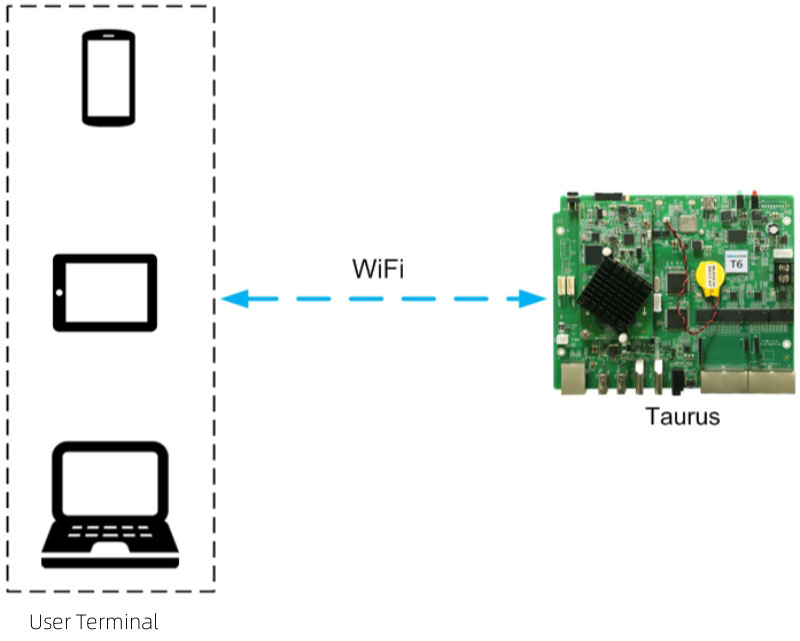
In this mode, each Taurus device provides its own WiFi access point (AP). Users can easily connect to the Taurus via a PC, tablet, or smartphone by accessing the WiFi AP, entering the provided credentials, and managing the device directly.
5.1.2 Cluster Application
For more extensive networks, Taurus devices can be linked via a bridge to access the internet through platforms like VNNOX and NovaiCare. The Taurus device offers three connectivity options, prioritized as follows:
- Wired Network
- WiFi
- 4G Network
The device automatically selects the best available connection.
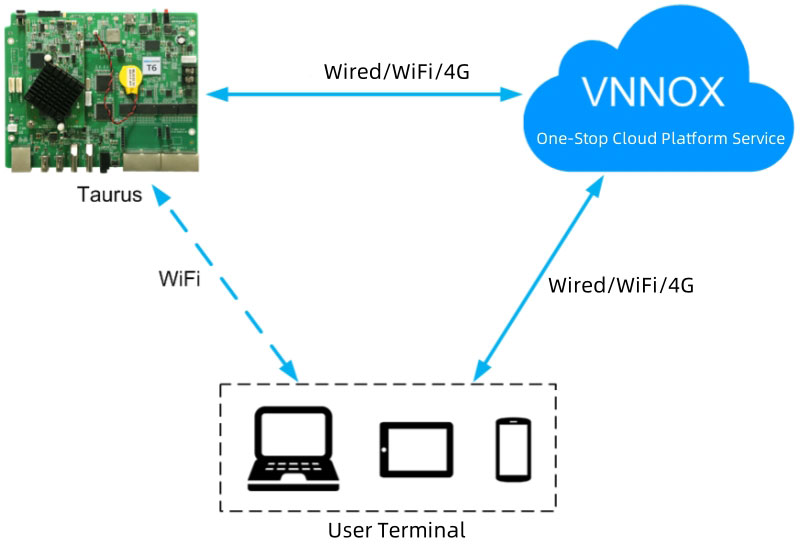
5.1.3 Splicing Application
This mode is ideal for creating larger, visually cohesive displays by connecting multiple Taurus devices. Each device provides its own WiFi AP, allowing users to connect via PC, tablet, or smartphone, and log in to each Taurus unit separately.
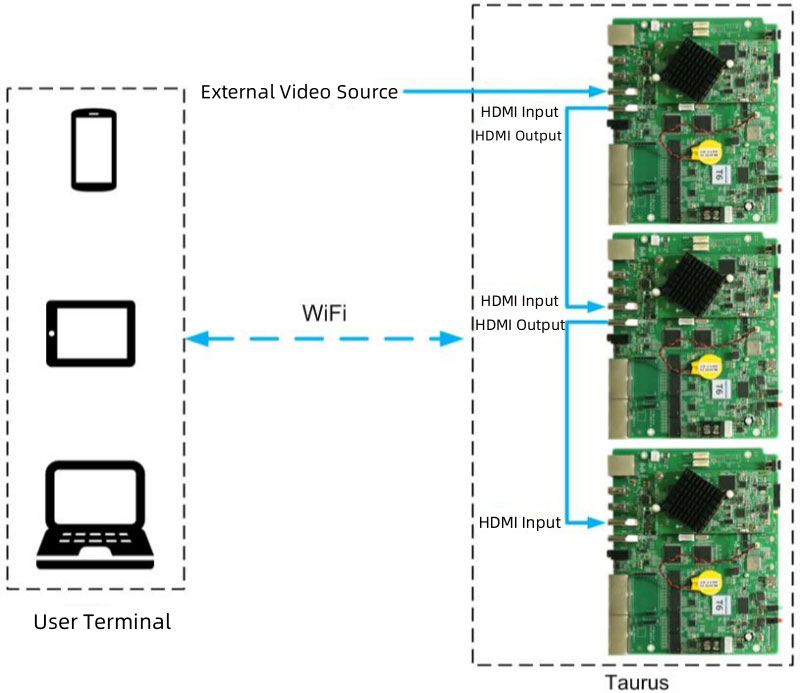
5.2 Post Screen Solution
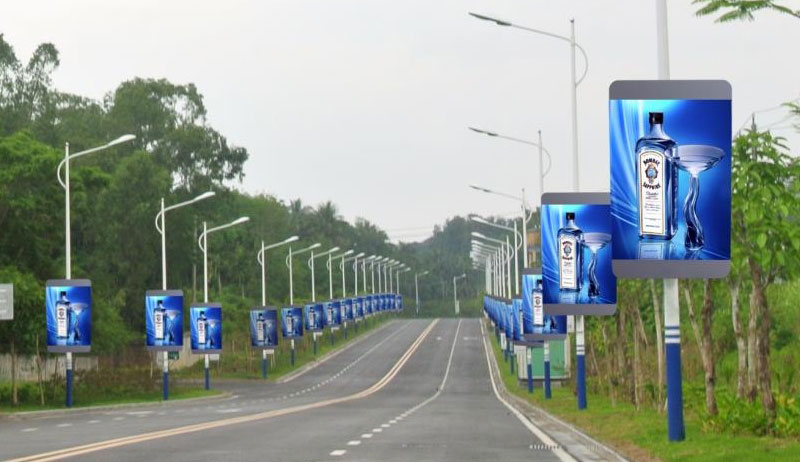
Smart Lamp Posts are increasingly becoming a common sight along highways and streets. These modern lamp posts offer significant advantages over traditional ones, which only provide lighting and static advertising.
Smart Lamp Posts, equipped with LED displays, can offer a wide range of functions, including:
- Lighting
- Security Monitoring
- Environmental Monitoring
- Emergency Calls
- Charging Stations
- Dynamic Advertising
The LED displays used in these smart lamp posts are intelligent and high-definition, making them ideal for road guidance, information broadcasting, and advertisement promotion. These screens can be deployed on a large scale without limitations on quantity, and the content displayed can be managed individually or controlled in bulk through a centralized system.
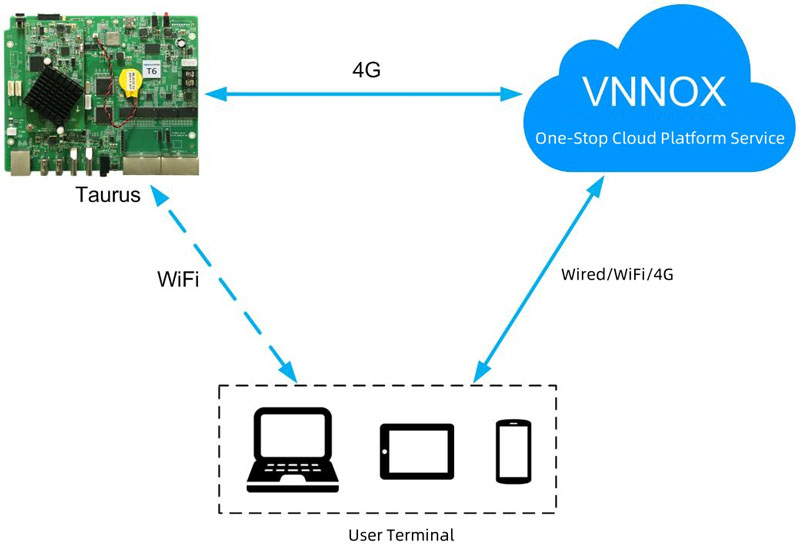
In terms of networking, the Taurus devices bridge access to the internet and allow for centralized management of the lamp post screens through VNNOX and NovaiCare platforms. While Taurus supports wired, WiFi, and 4G connections, using the 4G network is recommended for this solution due to its flexibility and reliability.
5.3 Synchronous Multi-Screen Displays
Some projects need several screens to show the same content at the same time. Building facades, shopping mall corridors, exhibition halls, and outdoor advertising groups often use this approach.
Taurus players support synchronous playback when the required conditions are met. All units must run the same playback plan. Time on every player must stay synchronized. The result is matching visuals across multiple screens with almost no visible delay.
5.4 Retail and Public Information Screens
Retail stores, chain shops, airports, bus stations, campuses, hospitals, and government buildings all use LED screens for daily information and promotion.
Taurus players suit these locations because they support both local control and cloud management. Staff can update content from a phone on site or push new programs to many screens at once from the office. The same hardware works for single displays or groups of screens.
6. NovaStar Taurus Player Manual and Guide
This section walks through the basic steps to get a Taurus player running.
6.1 Quick Start
Getting started with the NovaStar Taurus Multimedia Player is straightforward.
6.1.1 Connection Methods
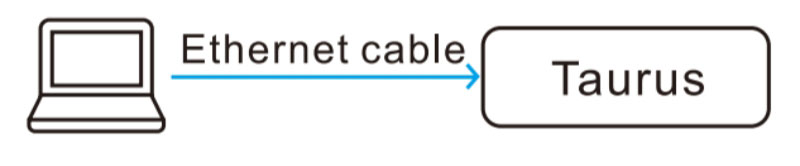
Wired Direct Connection:
Simply connect the Taurus player directly to your network using an Ethernet cable. Make sure that the DHCP service is available on the Viplex Express.
Wired Local Area Network (LAN) Connection:
Connect the Taurus player to a network router via an Ethernet cable. The DHCP service need to be turned off on the Viplex Express, and set your PC to obtain a IP address automatically.

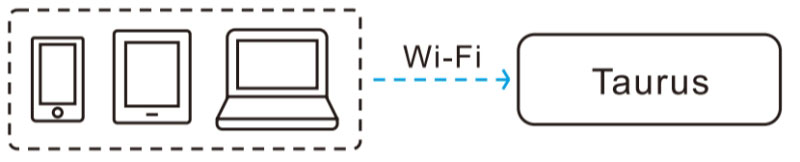
WiFi AP Connection:
The Taurus series players come equipped with built-in WiFi AP. The default SSID is “AP + SN” (e.g., AP100000033), and the default password is the same as the SSID.
No additional setup is required—just connect your PC, tablet, or smartphone to the WiFi network created by the Taurus player.
Wireless LAN Connection:
The Taurus player also supports WiFi Station mode, which allows it to connect to a local wireless network.

6.1.2 Logging into the Terminal
Once the hardware is connected, you can log in to the Taurus system to perform tasks like configuration, content publishing, firmware upgrades, and cloud management.
Default Credentials:
Username: admin
Password: SN2008@+
Logging in via Viplex Handy:
Step 1: Open the Viplex Handy and navigate to the “Local Devices” interface. : The Taurus is online and you can log in to it.
 : The Taurus is offline and you cannot log in to it.
Step 2: Tap “Connect” next to a device name.
Step 3: Enter the password for the “admin” user and tap “OK”.
Logging in via Viplex Express:
Step 1: Open the Viplex Express and go to the “Terminal” interface.
Step 2: Click “Refresh” to detect the Taurus player, then tap the desired terminal to log in. : Taurus is online and can be logged in.
 : Taurus is detected but cannot log in.
 : You have logged.
Step 3: Click “Connect”.
Step 4: Enter the “admin” username and password, then click “OK”.
Logging in via NovaLCT:
Step 1: Open NovaLCT software.
Step 2: Select the “User” option under the “Media Player Login”.
Step 3: In the “Terminal List” dialog box, click “Refresh”.
Step 4: Choose a device and click “Connect Device”.
Step 5: Enter the username and password, then click “OK”.
6.2 How to Configure Synchronous Playback?
Multiple Taurus players can show the same content at the same time. This is called synchronous playback. It works in asynchronous mode and is useful for multi-screen projects.
6.2.1 Synchronous Playback Requirements
Four conditions must be met.
- First, the player model must support the synchronous playback function.
- Second, the function must be turned on in the software.
- Third, the time on every player must be synchronized.
- Fourth, the same playback plan must be sent to all units. The plan cannot contain random transitions or random media.
Each solution page should contain only one media item. The media must be an image or a video. All media properties must match. Resolution cannot exceed the limit of the model platform (480p or 1080p depending on the group).
Players from different platforms should not be mixed in the same synchronous group.
6.2.2 NTP Time Synchronization
NTP is the recommended method when all players share a local network.
Set up an NTP server on the LAN. A computer can act as the server. Record the domain name or IP address.
Then configure each Taurus player. You can use ViPlex Handy or ViPlex Express on the same LAN. Select NTP as the synchronization mode and enter the server address. Enable the synchronous playback switch on the players that will show content.
On the public network, use VNNOX after the players are bound. Select NTP and choose or add the server, then apply the settings to the group.
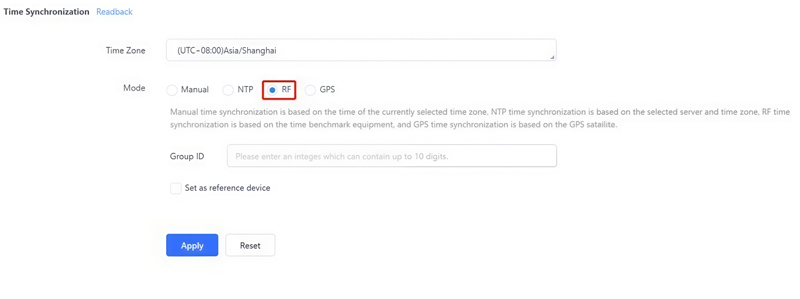
6.2.3 RF Time Synchronization
RF synchronization needs an extra hardware module. The supported model is E32-433T30D-NW.
Install one RF module on each player. One unit is set as the master. The master only provides the time reference and does not drive a screen. The other units are set as slaves. All units in the group must use the same Group ID.
The time of the slave devices follows the master through the RF network. You can configure the settings with ViPlex Handy, ViPlex Express, or VNNOX.
6.2.4 GPS Time Synchronization
GPS synchronization requires a compatible 4G module (EC20) and a SIM card.
Install the module and card on each player. Then set the time synchronization mode to GPS.
You can do this with ViPlex Express on the local network or with VNNOX after the players are bound. This method works well for outdoor sites where network time sources are unreliable.
6.3 Common Problems
6.3.1 When binding to VNNOX, the system cannot obtain the VNNOX server address.
Cause Analysis:
The Taurus player is not connected to the internet.
Resolution:
Step 1: Check if the internet connection indicator is either solid or blinking. Refer to the image of the Taurus T6’s indicator as an example:
If the indicator is solid or blinking, please contact with us.
If the indicator is not solid or blinking, proceed to Step 2.
Step 2: Use a network cable or wireless network to establish a stable internet connection for the Taurus player.
T6 Internet Connection Indicator Description:
Solid: Successfully connected to the internet, functioning normally.
Blinking every 2 seconds: Successfully connected to VNNOX, functioning normally.

6.3.2 An authentication error message appears when binding to VNNOX.
Cause Analysis:
The authentication information is incorrect.
Resolution:
Step 1: Visit the VNNOX website (www.vnnox.com) and log in to your account.
Step 2: On the cloud platform page, select “Player Authentication”.
Step 3: In the cloud authentication area, check the “Server Address”, “Authentication Username”, and “Authentication Password” to ensure they are correctly configured.
NovaStar Taurus Operation Tutorial
6.4 Resouces Download
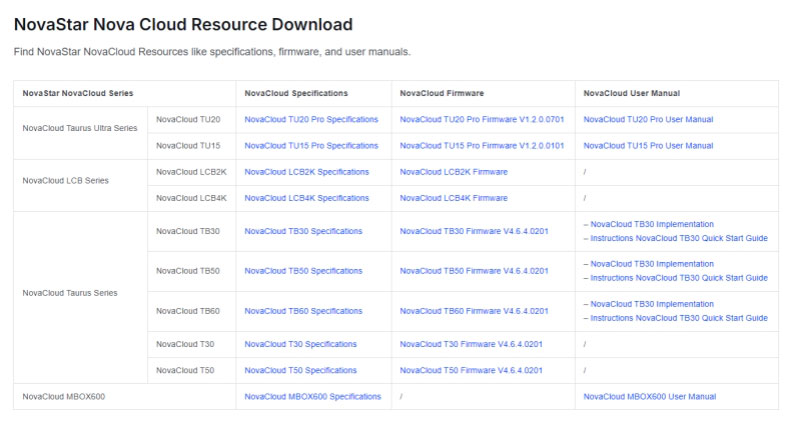
You can get the latest software, firmware, and manuals for Taurus players from . All files are free to download.
Whether you’re looking to access user manuals, or download the latest NovaStar Taurus Multimedia Player firmware, our LED Screen Cloud Platform has made it incredibly easy to access all the resources you need.
All NovaStar Resources Download, including software, firmware updates, and user manuals, are available for free.
7. FAQs
What is the default login password for Taurus players?
The default username is admin. The password is usually the one printed on the product label or the common default shown in the quick start guide (often related to the serial number). Change it right after the first login for better security.
Why can’t I connect to the Taurus Wi-Fi AP?
Make sure you are connecting to the correct SSID. It starts with “AP” followed by the last eight digits of the serial number. The password is the same as the SSID. Move closer to the player if the signal is weak, and forget any old saved networks with the same name.
Can I mix different Taurus models in one synchronous playback group?
No. Players from different platforms should not be mixed. Use models that share the same platform for reliable synchronous playback.
How do I check if time synchronization is working?
After setting NTP, RF, or GPS, compare the current time shown on each player in the software. If the times match closely and stay matched, the synchronization is working. For RF setups, also confirm that all units share the same Group ID.
The player is bound to VNNOX but still shows offline. What should I check?
First confirm the player has a real internet connection (check the network indicator light). Then verify the server address, authentication username, and password are exactly the same as those in your VNNOX account. Wait a few minutes after saving and refresh the cloud page.